Studio Basics
Learn how every Q-Booth studio works: the screen layout, shared settings, testing a template, saving it and adding it to an event.
A studio is where you build one template: an AI photo, a face swap, a collage, a boomerang video and so on. All studios share the same layout and the same basic steps, so once you know one, the others are easy. This article explains what they have in common.

Chapters (8)
Studio and Event: how they fit together
Q-Booth has two main parts:
- Event: the "container" for one occasion. It holds the templates, categories, screen design, sharing settings and statistics. The event is what you launch at the venue.
- Studio: the workshop where a single template is designed and tested. Each studio saves its own kind of template file.
A studio never works on its own: the goal of every template is to be added to an event. An event without templates cannot be launched. See Events overview and Templates.
The studios and what each one makes
| Studio | What it makes | Template file |
|---|---|---|
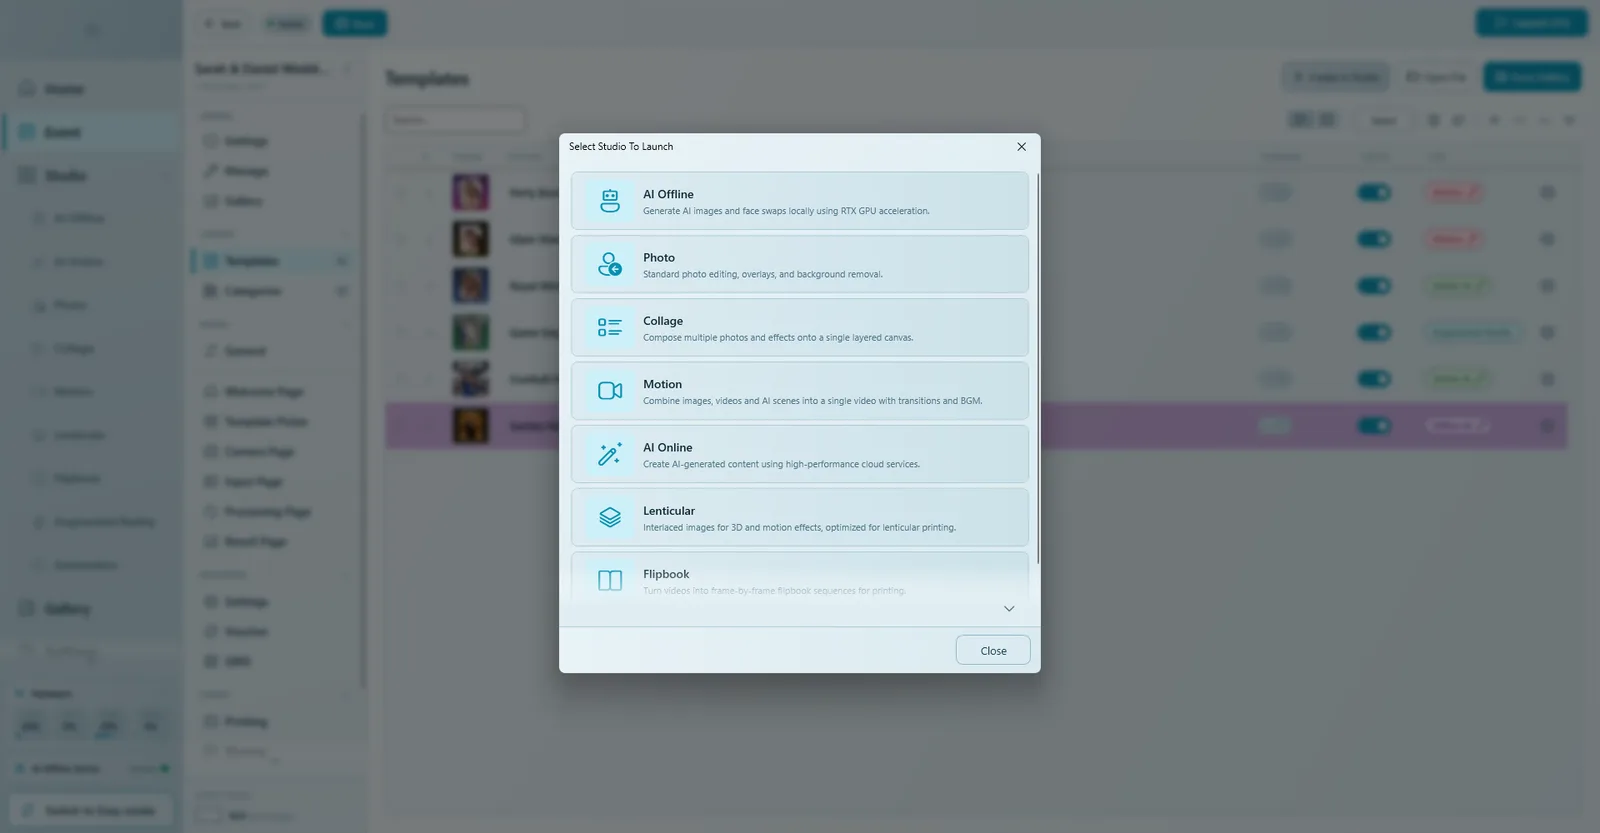
| AI Offline | AI pictures created on the booth computer (Imagine, Re-Imagine, Composite), no internet needed. | .qsd |
| Face Swap (inside AI Offline) | The guest's face placed into any picture. | .qsd |
| AI Online | AI pictures and short AI videos made by an online AI service. | .qso |
| Photo | A single photo with background removal or replacement, guide image, frame and filter. | .qsp |
| Collage | Several photos, texts, images and frames on one canvas (photo strips, 4R layouts). | .qsc |
| Motion | Videos: boomerang, 360, clip sequences with transitions and music. | .qsm |
| Lenticular | Interlaced images for lenticular prints that change with the viewing angle. | .qsl |
| Flipbook | A printed flip book made from a short video. | .qsf |
| Augmented Reality | Augmented-reality effects for the booth. | |
| Automation | Batch processing: watches a folder and processes every new file automatically. |
Which studios you see depends on your licence. Lenticular, Flipbook and Augmented Reality are add-ons. Looking for an easy video booth? See Video Booth (Easy Mode).
Open a studio
There are two ways, and the studio works the same in both:
- From the sidebar: click Studio › AI Offline (or any other studio). Use this for templates you want to reuse in many events.
- From inside an event: in the event editor open Templates, click Create in Studio and pick a studio in the Select Studio To Launch dialog. The studio opens in its own window. Use this for a template that belongs to one event only.
The studio screen
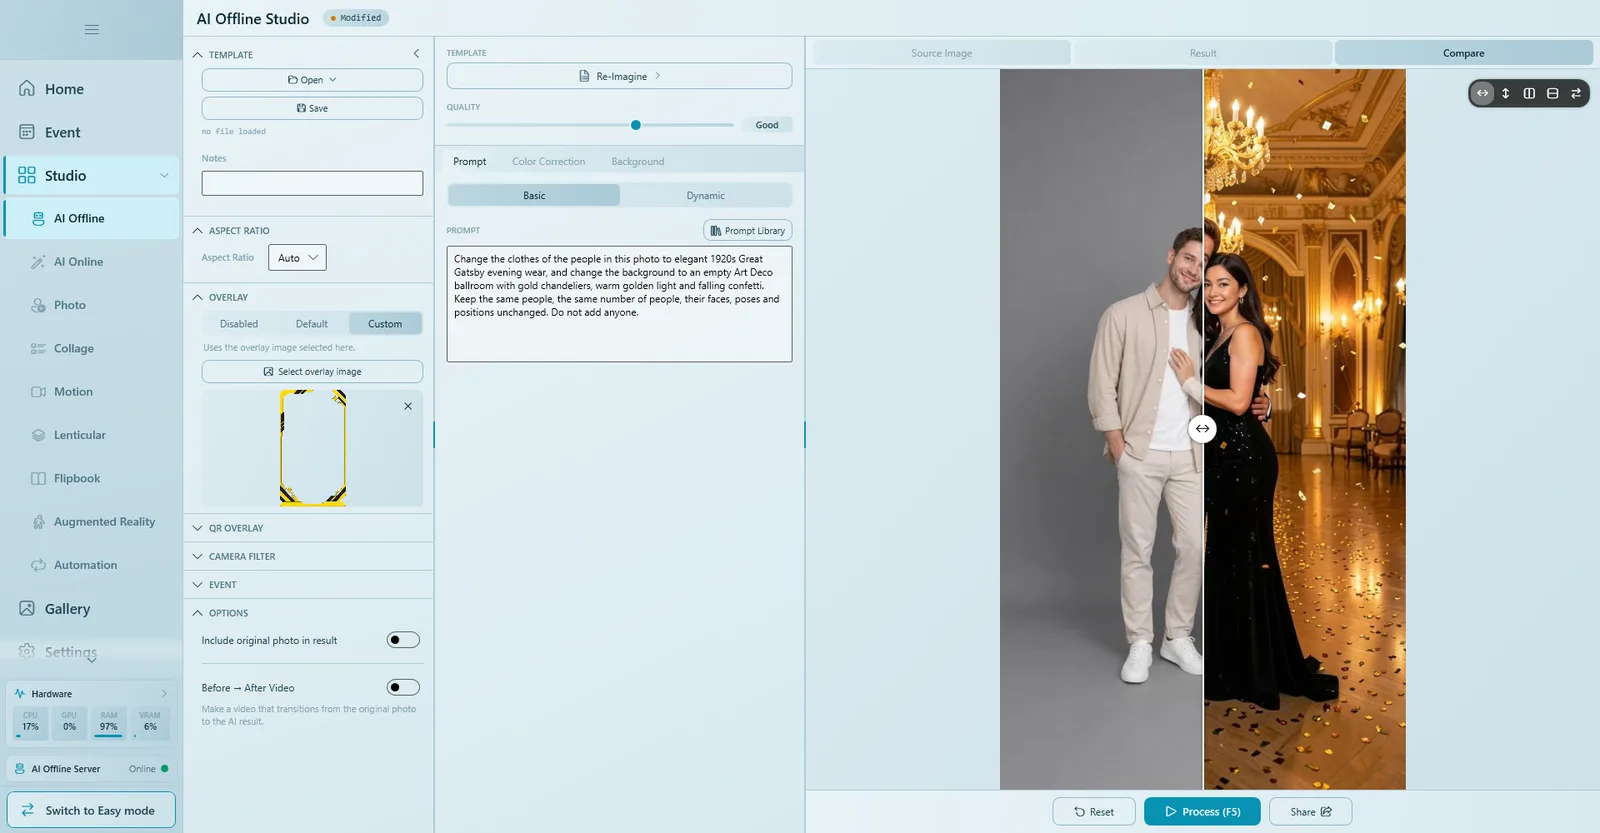
Every studio has three columns and a button row:
| Area | What it contains |
|---|---|
| Left panel | Collapsible groups shared by all studios: Template, Aspect Ratio, Overlay, QR Overlay, Camera Filter, Event, Options. |
| Middle panel | The settings of this particular studio (AI template and prompt, face swap, layers, clips…). |
| Right panel | Tabs Source Image (the test input), Result and, once there is a result, Compare. |
| Bottom row | Reset, Process (F5) and Share. |
| Next to the title | The file status: Not saved yet, Modified, or the name of the open file. |
The shared settings groups
Not every group appears in every studio, but where they appear they work the same way.
| Group | What it does |
|---|---|
| Template | Open a template file, Save the current one, see which file is loaded, and keep internal Notes (guests never see them). |
| Aspect Ratio | The shape of the result. Auto follows the source photo (or the event that uses the template). |
| Overlay | The frame on top of the result. Default uses the global overlay from Settings (or the event's overlay, inside an event), Custom lets you pick a frame just for this template, Disabled uses none. See Event overlay. |
| QR Overlay | Whether a QR code is printed on the result for this template. |
| Camera Filter | Use Global follows the app setting, Off uses no filter, Custom picks a filter for this template. See Overlay & Filters. |
| Event | Caption: the name guests see. Cover image: the picture on the template card in the template picker. |
| Options | Extra outputs, for example Include original photo in result or Before → After Video (in the AI studios). |
Test a template in the studio
You always build a template on a test photo. At the event, the guest's photo takes its place.
- Click the Source Image tab on the right.
- Click Select Image and choose where the test photo comes from: Camera (take a photo with the connected camera), Clipboard (paste a copied image), Gallery (a photo already taken in Q-Booth) or File (an image on your computer). You can also drag an image onto the panel.
- Set up the studio's own options in the middle panel.
- Press Process (F5). When it is done, the Result tab opens.
- Open Compare to drag a slider between the original and the result.
- Change settings and press F5 again until you like it. Reset clears the source and result so you can start over.
Test with a photo that looks like the real event: the same light, the same number of people, the same camera. A template that works on one perfect stock photo may behave differently with a group of four.
Save the template file
- Fill in Caption and choose a Cover image in the Event group, so the template looks good in the template picker.
- Click Save in the Template group and choose a file name. The status next to the title changes to the file name.
- After any further change the status shows Modified: save again before you close the studio.
To continue working on a template later, click Open and choose From Gallery..., Browse File... or one of the recent files.
Add the template to an event
Open the event and go to Templates. There are three buttons:
| Button | When to use it |
|---|---|
| Create in Studio | Build a new template right now. The studio opens in its own window with a Save & Return button at the top of the left panel: click it and the template appears in the event's template list. Cancel returns without adding anything. |
| Open File | Add one or more template files you saved earlier. |
| From Gallery | Pick templates from the built-in Template Gallery. |
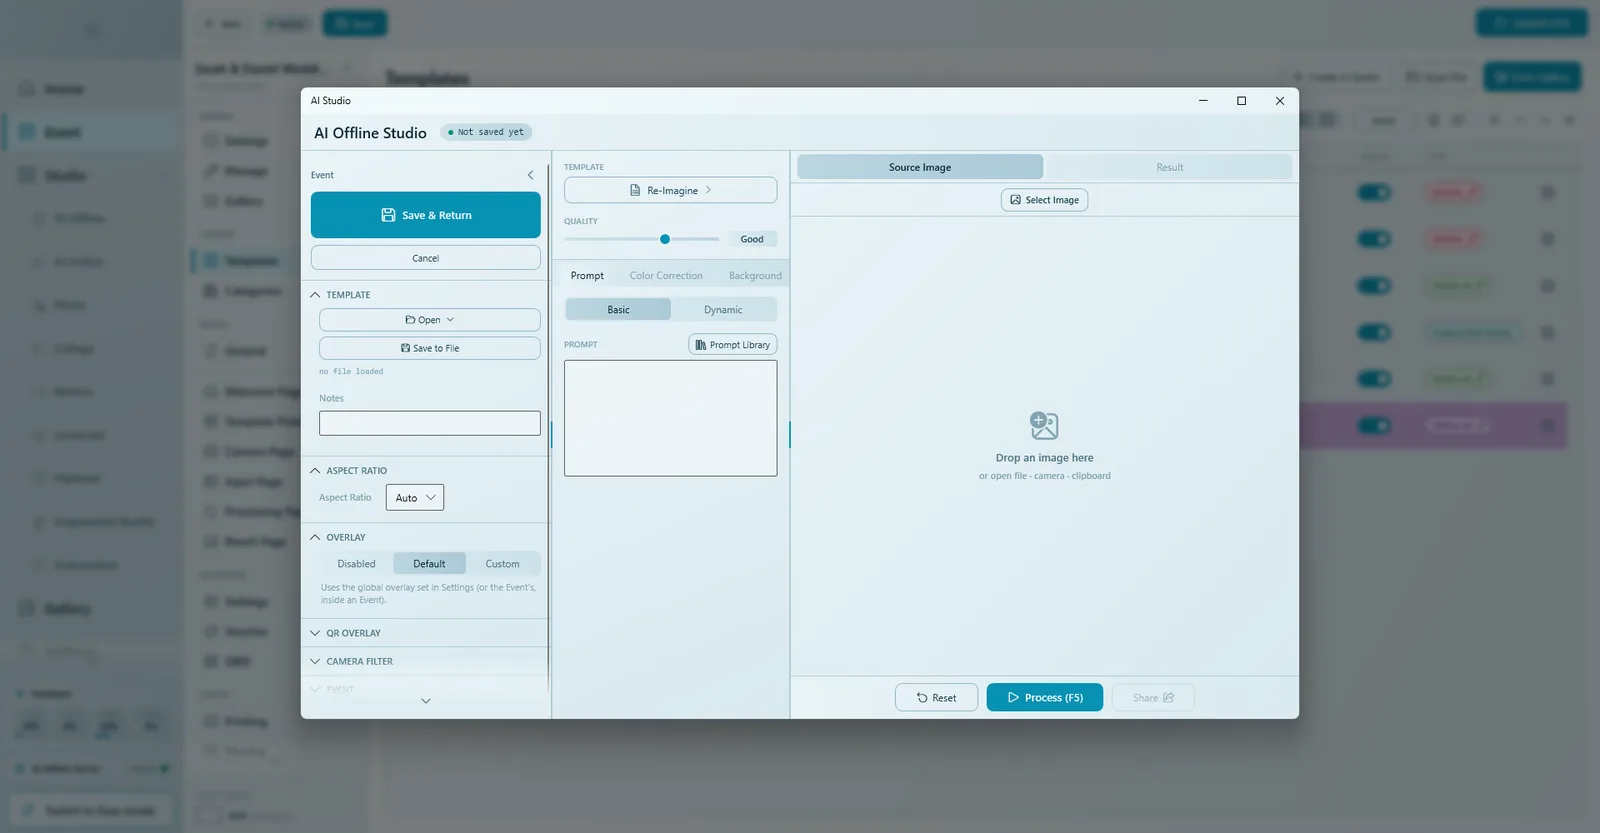
After Save & Return, also click Save in the event editor. The new template is only stored with the event when the event itself is saved.
To change a template that is already in an event, click its coloured type label in the template list: it reopens the template in its studio. Full details are in Templates.
Good habits
- Give every template a clear caption and cover image: guests choose by the picture.
- Use Notes for yourself (which frame, which event, what to watch out for).
- Keep reusable templates (your standard face swap, your house frame) as saved files and add them with Open File or From Gallery.
- Always run a final test in the event itself before the doors open. See the Event checklist.
Next steps
Still need help?
Our team answers on WhatsApp. Tell us your Q-Booth version and what you see on screen.