Face Swap
Build a Face Swap template that puts your guests' faces into any picture, for one guest or a whole group.
Face Swap puts your guests' faces into any picture: a royal portrait, a movie poster, a superhero. It runs on the booth computer, with no internet and no cost per photo, and it handles single guests as well as groups.

Chapters (9)
Before you start
- Licence: Face Swap needs an Advanced or Pro licence.
- No AI Offline Server needed: Face Swap uses its own face engine, so it works even when the AI Offline Server status is Offline. No internet is needed either.
- Graphics card optional: it runs on the processor, and much faster on an NVIDIA graphics card. Choose the device in Settings › Advanced › Compute Device (Auto, CPU or GPU); GPU mode needs the GPU Pack. See Advanced settings.
- Scene pictures: prepare the pictures the faces will go into (see Choosing scene images).
How Face Swap works
Face Swap uses two pictures:
| Picture | What it is |
|---|---|
| Source Image (the face image) | The photo with the face to use. At the event this is the guest's photo from the camera; in the studio you load a test photo. |
| Scene Image | The picture the faces are placed into. It becomes the result, so its size and look are the size and look of the final picture. |
Q-Booth finds the faces in both pictures, numbers them, and places face 1 of the guest photo onto the first chosen face of the scene, face 2 onto the second, and so on.
Build a Face Swap template step by step
- Open Studio › AI Offline.
- Click the Template button in the middle panel, choose Face Swap ("Swap a captured face onto a scene photo") and click Use Template.
- On the right, in Source Image, click Select Image and load a test photo of the guest (Camera, Clipboard, Gallery or File).
- In the Face Swap tab, click Select Image under Scene Image and choose the scene picture. The faces are found automatically and numbered: "2 faces found - click a face to use or skip it".
- Click the faces in the scene in the order you want them filled, or click a face to skip it. Clear resets your choice.
- Set Face Image positions and Face Image order for the guest photo, and Scene Image positions and Scene Image order for the scene (explained below).
- Check the Mapping preview: every row must show a guest face → scene face pair.
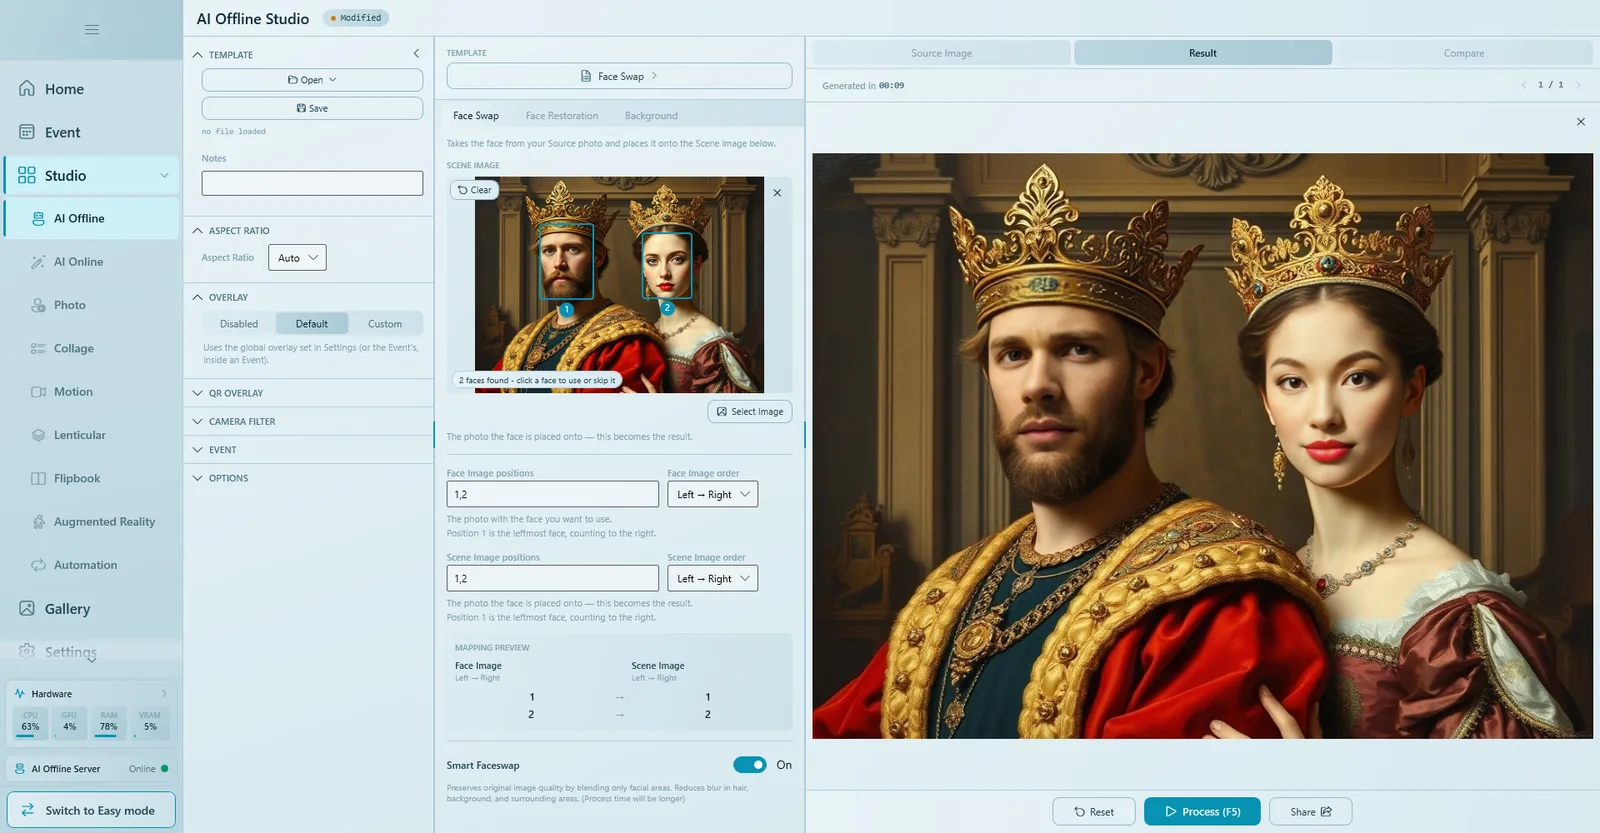
- Turn on Smart Faceswap if you want hair and background to stay as sharp as the original.
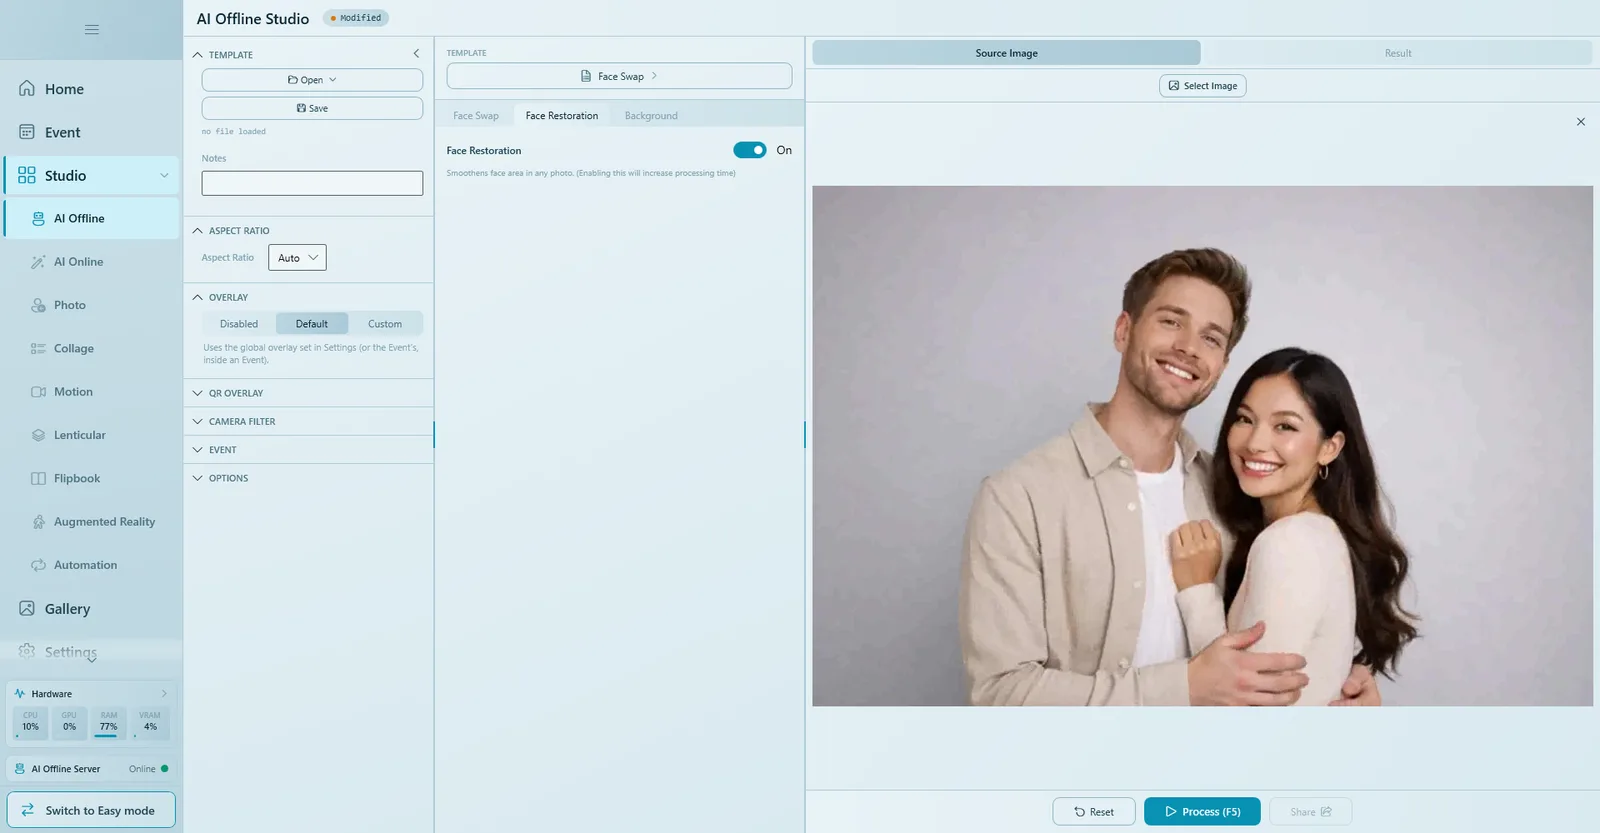
- Open the Face Restoration tab and turn it on to smooth the new faces.
- Press Process (F5), then check the result in Result and Compare.
- Add a frame under Overlay, turn on Before → After Video under Options if you like, fill in Caption and Cover image, and click Save. The template is saved as a
.qsdfile, with the scene picture stored inside it.
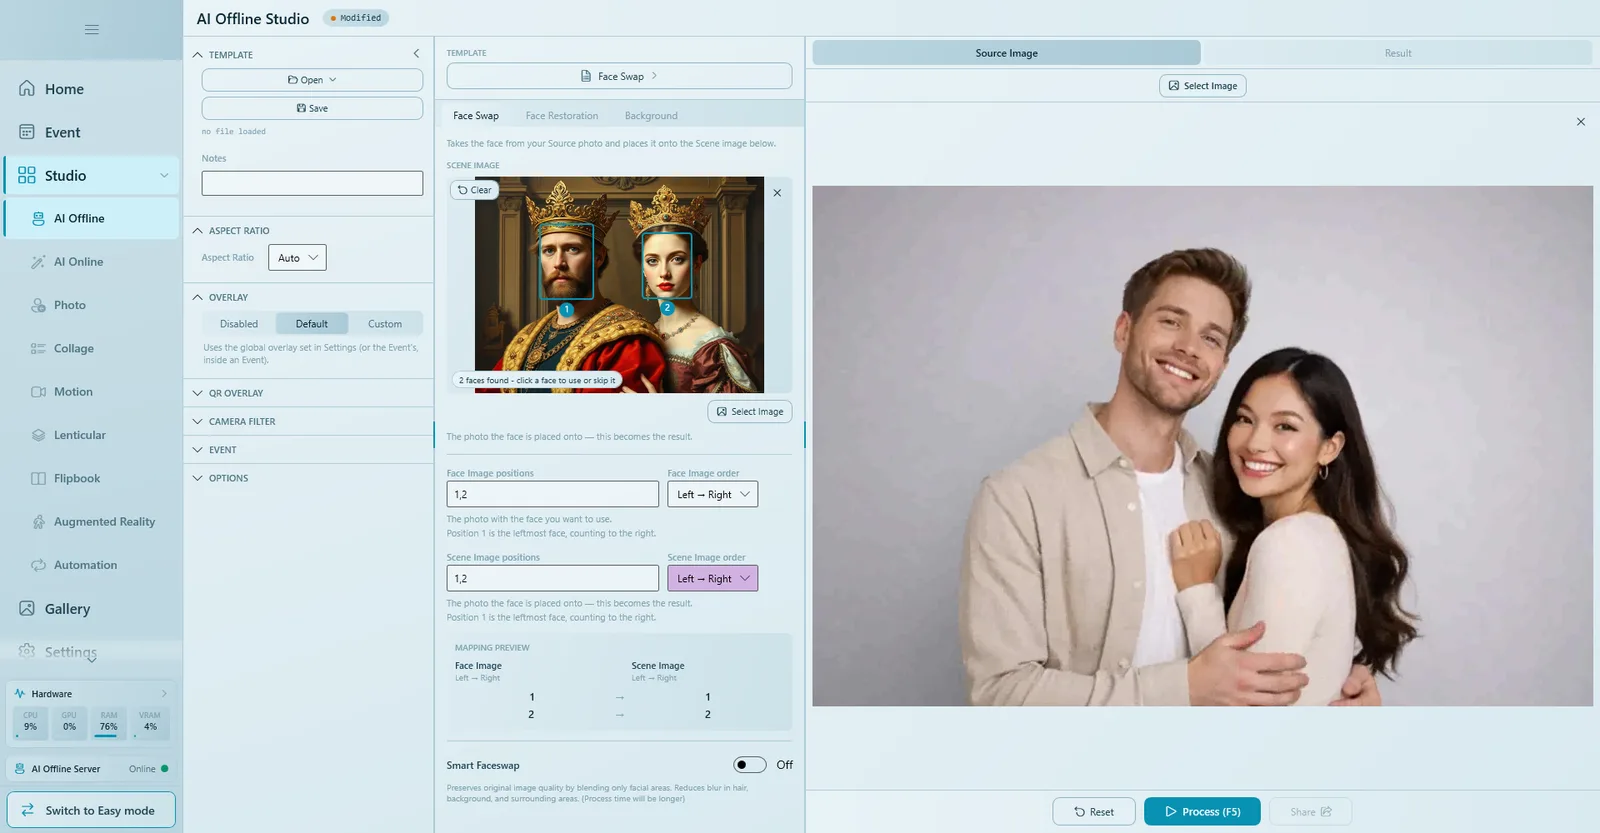
Positions and order: which face goes where
Faces are counted in the order you choose and listed as positions, separated by commas (for example 1,2).
| Setting | What it does |
|---|---|
| Face Image positions | Which faces of the guest photo are used, for example 1,2. |
| Face Image order | How the guest photo's faces are counted: Left → Right, Right → Left, Top → Bottom, Bottom → Top, Small → Large or Large → Small. With Left → Right, position 1 is the leftmost face. |
| Scene Image positions | Which faces of the scene are replaced, in pairing order. |
| Scene Image order | How the scene's faces are counted. |
| Mapping preview | The resulting pairs, for example 1 → 1 and 2 → 2. Check it before every event. |
The first face position goes onto the first scene position, the second onto the second. Example: a couple stands man left, woman right; the scene has a king on the left and a queen on the right. With both lists set to 1,2 and both orders Left → Right, the man becomes the king and the woman the queen.
If the two lists have different lengths, the extra entries are ignored ("The two lists have different lengths — extra entries are ignored."). The result can then put a face in the wrong place without an error, so always look at the Mapping preview.
Group photos and one face for everyone
- A group: fill the positions according to the number of people, for example
1,2,3,4for four guests and a scene with four faces. - One face onto many: set Face Image positions to just
1. That single face is placed on every scene face you list; with an empty scene list it goes on every detected face ("Face 1 will be placed on every detected face in the Scene image."). Fun for "a crowd of the same guest". - Match how guests stand: choose the order that fits the scene. For a row of people Left → Right is easiest; for a scene with one big main face, Large → Small puts the main guest in the main role.
Smart Faceswap and Face Restoration
| Option | What it does |
|---|---|
| Smart Faceswap (Face Swap tab) | Blends only the face area, so hair, background and the rest of the picture keep the original quality. Takes longer. |
| Face Restoration (its own tab) | Smooths and cleans up the swapped faces. Takes longer. |
| Background (its own tab) | Optionally removes or changes the background after the swap. |
The Aspect Ratio of a face swap always follows the scene picture.
Choosing scene images
- Use clear, front-facing faces that are not covered by hair, hands, masks or sunglasses.
- Choose a scene with the same number of faces as the group you expect, or prepare a few versions (single, couple, group).
- Faces at a similar angle and size to a booth photo give the most natural result.
- Use a high-resolution scene: the result has the scene's size.
- Use pictures you have the right to use at your event.
Use it at an event
Add the saved .qsd in the event with Templates › Open File, or build it there with Create in Studio (see Studio basics). Each guest takes one photo, and a few seconds later their face is in the scene. Face Swap can also be used as a layer in other studios, for example in a collage.
Tips for the best results
- Remind guests to look at the camera: if no face is visible, the swap cannot run.
- Good, even light on the guests' faces makes a big difference.
- Set the face order to match how guests usually stand in front of your booth.
- On a computer without a graphics card, set the face engine to Keep Loaded in Advanced settings, so only the first photo of the session waits for the engine to load.
- Use Smart Faceswap and Face Restoration for printed results; turn them off if speed matters more.
Common problems
"No faces found in this image"
The scene or the test photo has no clear face. Use a picture with a visible, front-facing face that is large enough.
The wrong guest ends up in the wrong place.
Check the Mapping preview, the two orders and that both position lists have the same length.
"Face swap requires an Advanced or Pro license."
Your licence does not include Face Swap. Upgrade to Advanced or Pro.
"Please select a scene image for the face swap."
Choose a picture under Scene Image before you process or save.
"No NVIDIA GPU was detected" or "GPU mode needs an additional pack"
Set Compute Device to Auto or CPU, or download the GPU Pack in Advanced settings.
Next steps
Still need help?
Our team answers on WhatsApp. Tell us your Q-Booth version and what you see on screen.