Print and Cut (sticker printer)
Print and cut stickers on a Liene PixCut S1: add it in Printer Setup, set the cut line, knife and alignment, and send a sticker template's prints to it.
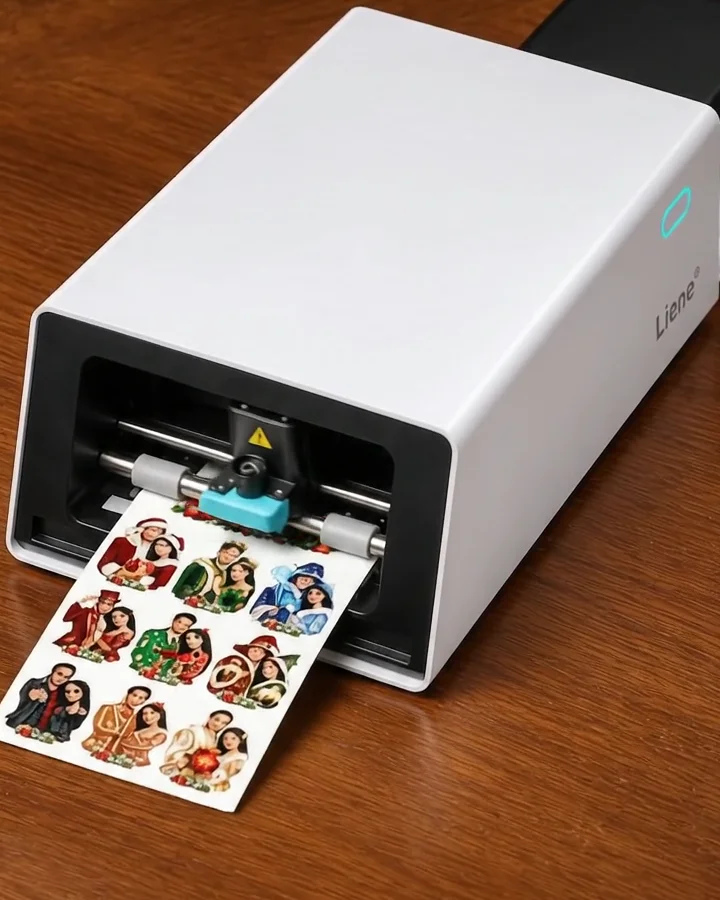
Q-Booth can print and cut stickers on a Liene PixCut S1. It prints the picture, then cuts around each sticker on the sheet, in one go: guests peel the stickers straight off. Add it once in Printer Setup, then send your sticker template's prints to it.

Chapters (14)
Before you start
- A Liene PixCut S1 connected with a USB cable. Bluetooth isn't supported. There is no driver to install.
- Close the Liene app while Q-Booth uses the printer.
- Liene 4 × 7 in sticker sheets in the paper cassette, glossy side up (see Paper and ink).
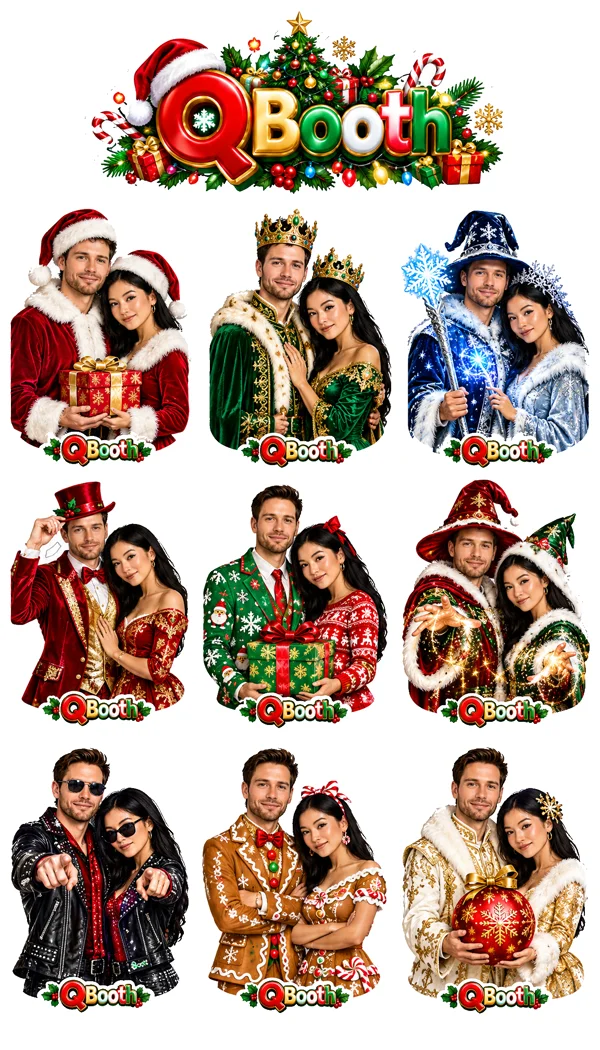
- A sticker picture, usually made by an AI Online template (see Pictures that cut well).
Add the sticker printer
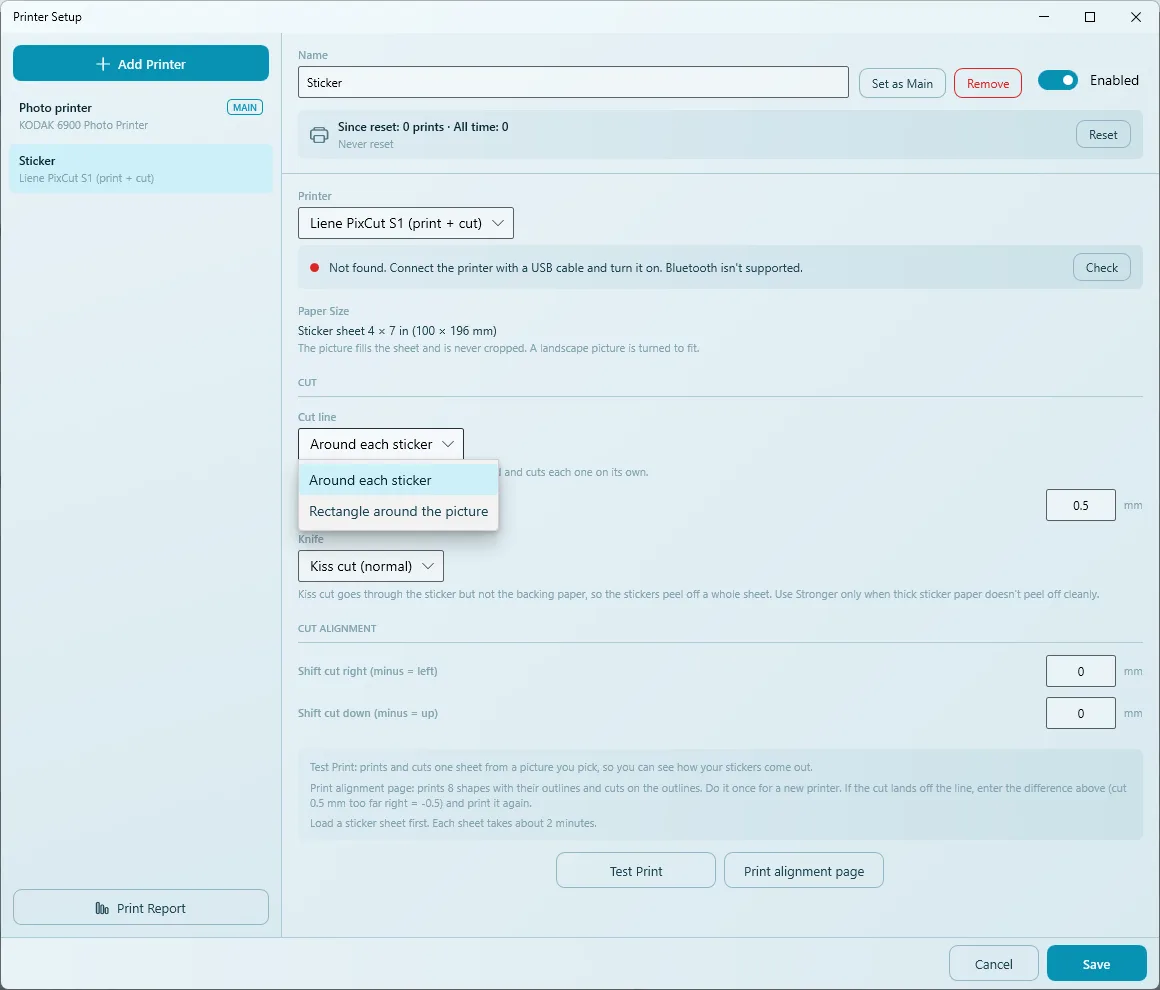
- Open Settings › Hardware and, under Printer Setting, click Configure….
- In Printer Setup, click Add Printer.
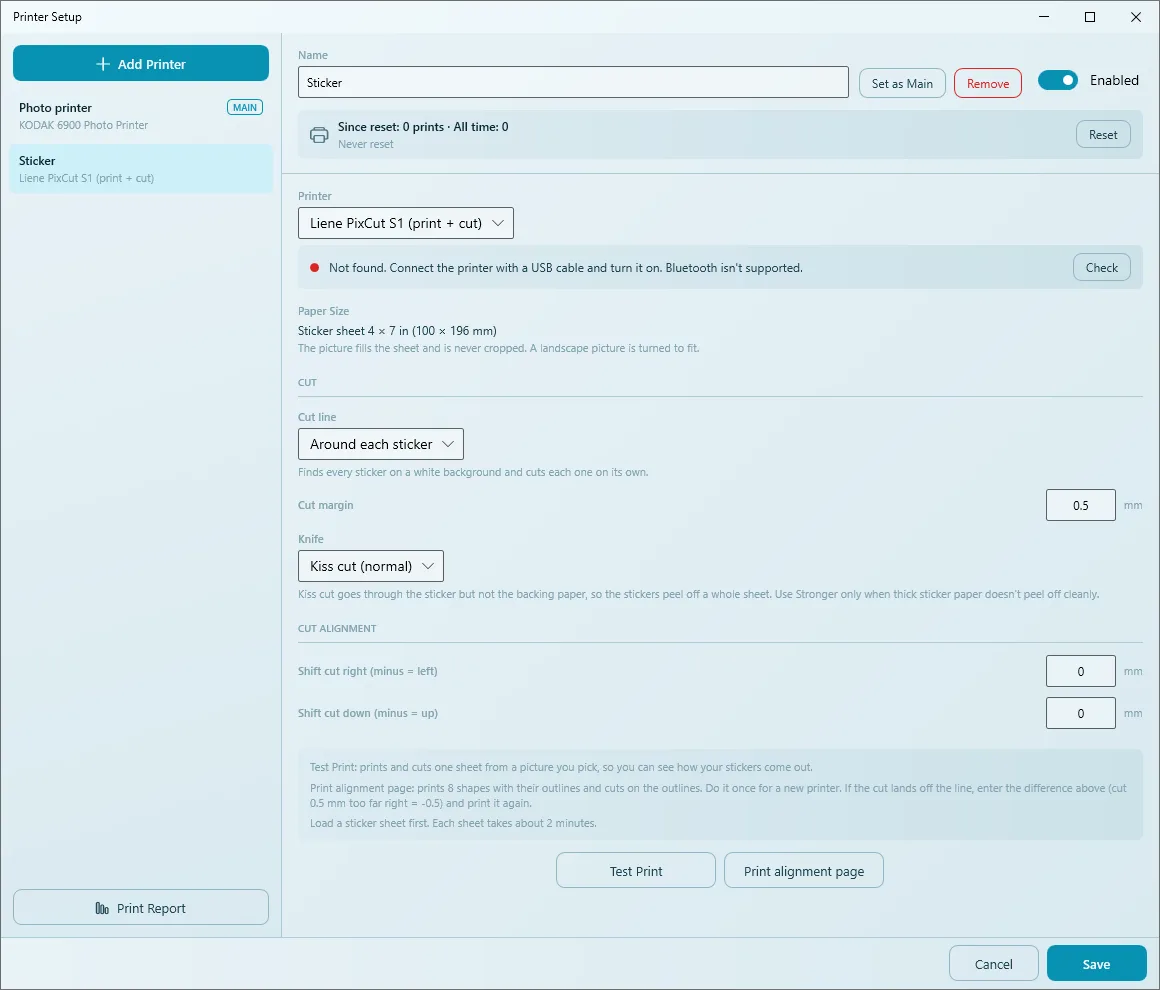
- In the Printer list, pick the last item, Liene PixCut S1 (print + cut). The entry is named Sticker. It is always in the list, even when no Liene is plugged in. Windows' own "Liene PixCut S1" printer is not listed, because printing through it doesn't cut.
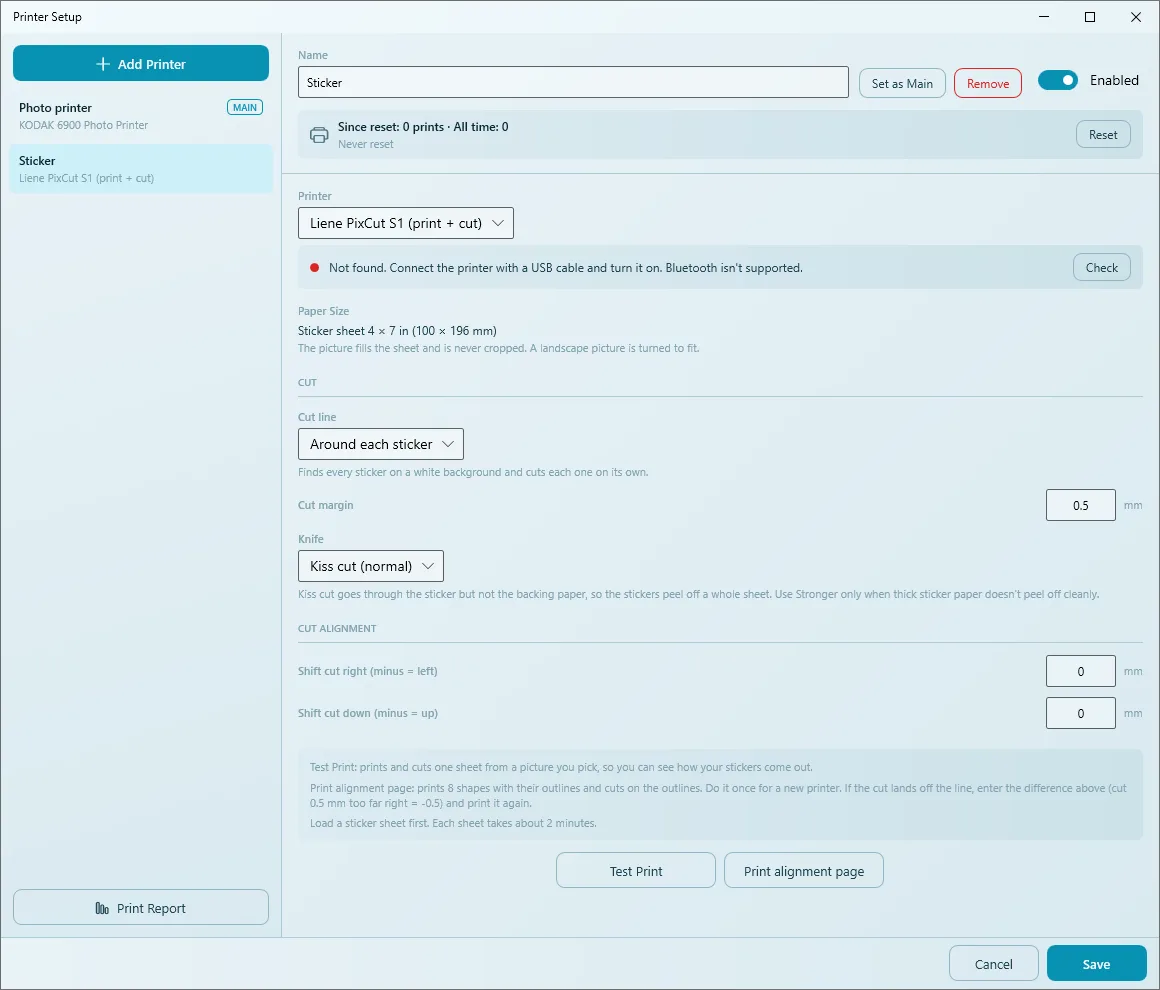
- Press Check and read the status line (below).
- Set the cut (below), then click Save in the Printer Setup window.
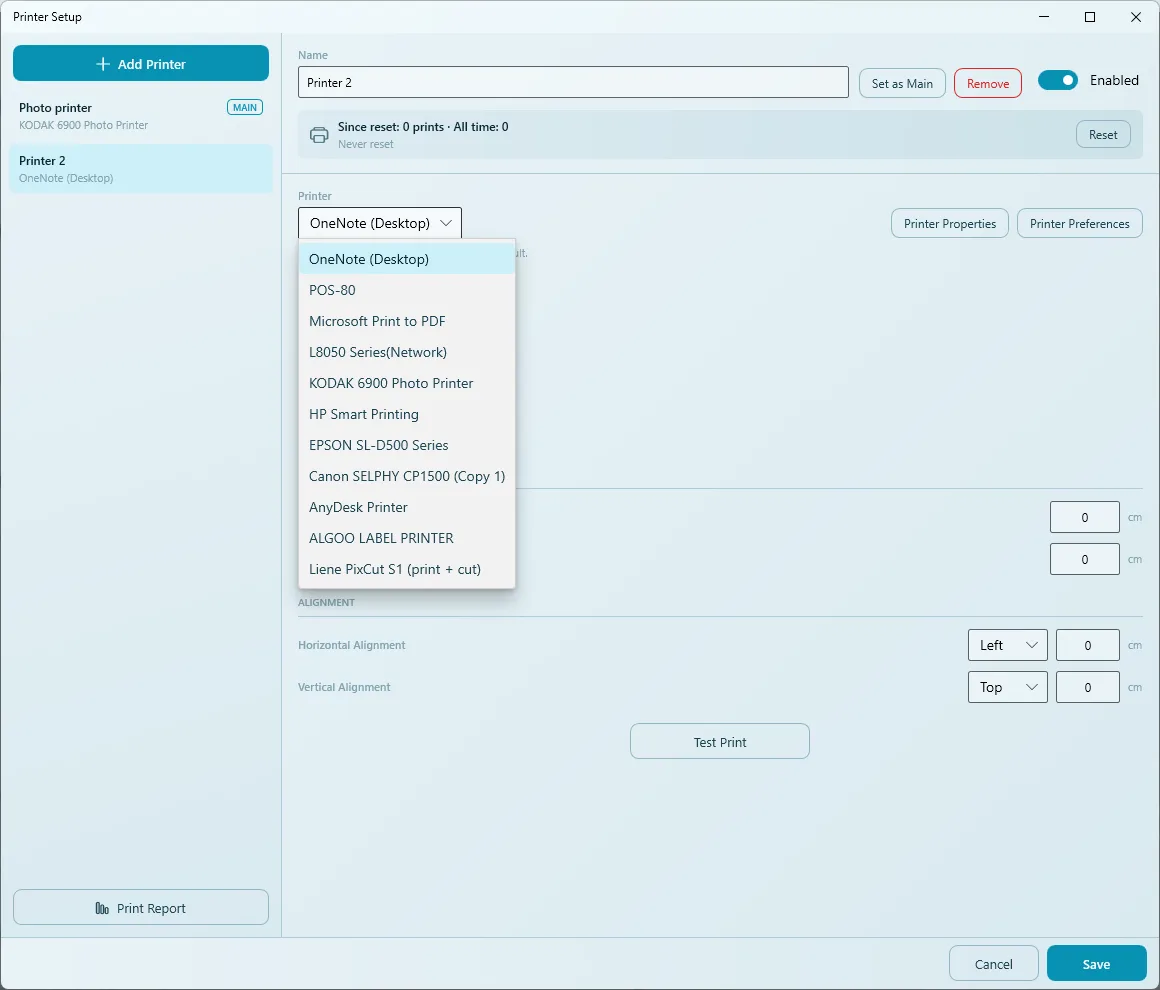
Your photo printer keeps working as before: adding the sticker printer doesn't change which printer is Main.
The status line
- Green dot with the firmware version: ready.
- Not found: plug in the USB cable and turn the printer on, then press Check.
- Another program is using the printer: close the Liene app, then press Check.
Paper and cut settings
| Setting | What it does |
|---|---|
| Paper Size | Always the Liene 4 × 7 in sticker sheet (100 × 196 mm). The picture fills the sheet and is never cropped; a landscape picture is turned to fit. A 2:3 picture leaves a white band at the top and bottom; 9:16 nearly fills it. |
| Cut line | Around each sticker: finds every sticker on the white background and cuts each one on its own. Rectangle around the picture: one straight cut around the whole picture. |
| Cut margin | How far outside the sticker the cut runs. Default 0.5 mm. |
| Knife | Kiss cut (normal) cuts the sticker but not the backing paper, so the stickers peel off a whole sheet. Use Stronger only for thick sticker paper that doesn't peel off cleanly. |
Cut alignment and Test Print
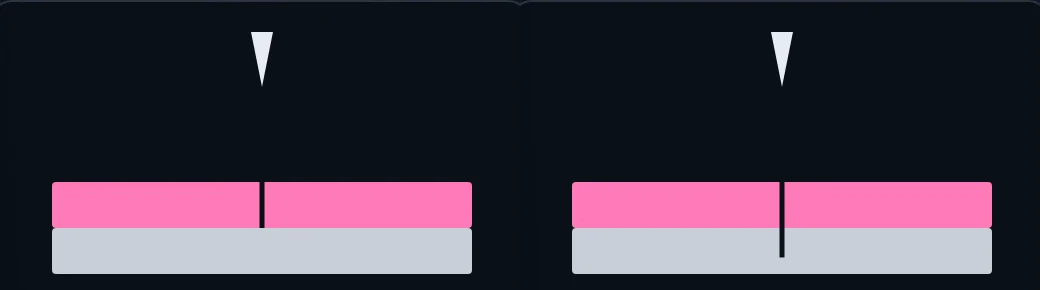
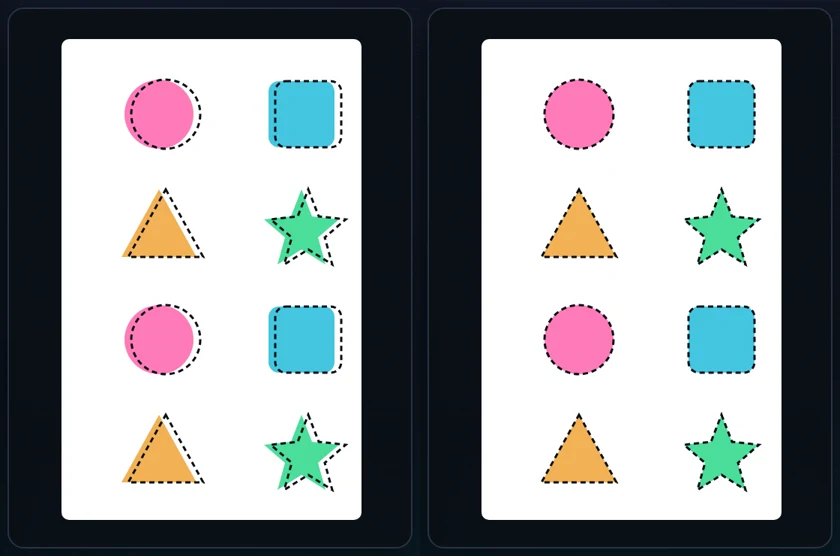
- Once for a new printer, click Print alignment page. It prints 8 outlined shapes and cuts on the outlines.
- If the cut lands off the line, enter the difference under Cut alignment: a cut 0.5 mm too far right =
-0.5in Shift cut right (minus = left). Use Shift cut down (minus = up) the same way. Print the page again to check. - Click Test Print and pick a picture: it prints and cuts one sheet, so you can see how your stickers come out.
- Click Save.
A sheet takes about 2 minutes. Several copies print one after another.
Pictures that cut well
With Around each sticker, the cut follows the white background around the stickers. The easiest way to get such a picture is an AI Online template whose prompt asks for:
- stickers on a plain white background,
- each sticker with its own white border,
- space between the stickers, so no two touch.
An ordinary photo with no white background has no stickers to find, so it can't be cut that way.
Send prints to the sticker printer
The sticker printer only gets what you send to it on purpose. Automatic printer choice never sends a photo to it, unless it is your only printer.
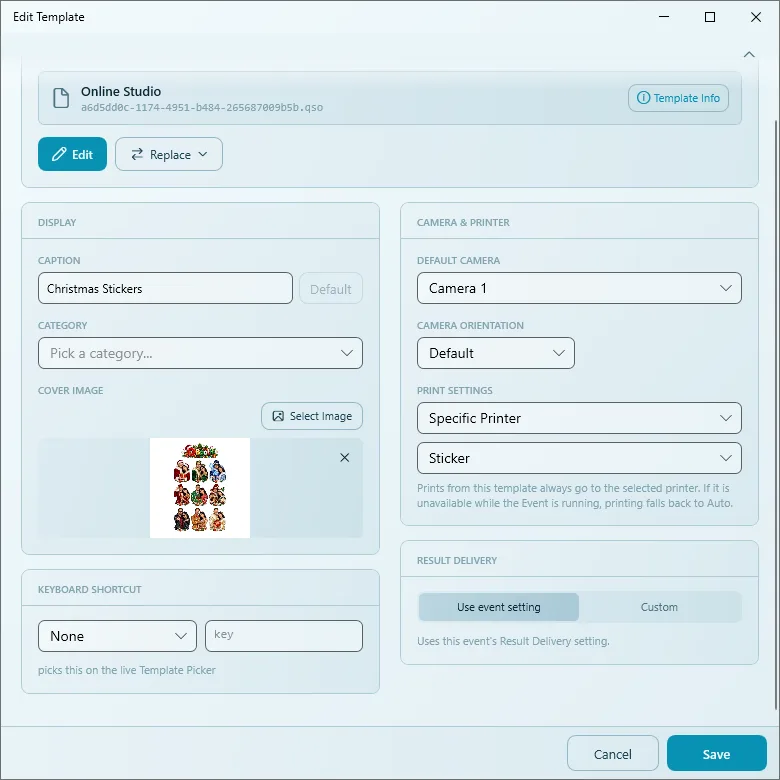
- From an event: in Expert mode, open the event, go to Templates, click the gear (Advanced settings) on your sticker template, and under PRINT SETTINGS choose Specific Printer, then Sticker. Prints from that template always go to the sticker printer.
- By hand: pick Sticker in the print window.
More about printing at events: Sharing & Printing.
Paper and ink
- Sticker sheets go in the paper cassette at the front of the printer, glossy side up, up to 18 sheets. Set its width guide to 4×7.
- The colour comes from an ink cartridge in the side slot. One cartridge prints 36 sheets.
- Liene sells sheets and cartridges together in a refill pack. At a busy event, refill the cassette every 18 sheets.
Troubleshooting
The sticker printer says "Not found".
Check the USB cable, turn the printer on and close the Liene app, then press Check.
"USB write failed", "LIBUSB_ERROR_IO" or "LIBUSB_ERROR_ACCESS" (5.9.9.0).
Most often the printer ran out of paper and the cassette was pulled, or the printer was only just plugged in. Load sticker sheets, wait a few seconds and print again. On 5.9.9.0 a pause (out of paper, no cartridge, cover open, paper stuck) only shows when the print fails, often as one of these USB errors.
The cut is a bit off the picture.
Click Print alignment page, then set the shift under Cut alignment (see Cut alignment and Test Print).
Two stickers were cut as one.
The stickers in the picture touch. Ask the AI prompt for more space between them.
How do I refill?
Sheets in the front cassette (glossy side up, up to 18), ink cartridge in the side slot (36 sheets each). Buy Liene's refill pack from Liene or a store.
Can it print photos without cutting?
Not from Q-Booth: it always prints and cuts on the sticker sheet.
Next steps
Still need help?
Our team answers on WhatsApp. Tell us your Q-Booth version and what you see on screen.