Interface Tour
Find your way around the main window: the menu, Home, the hardware box, the AI Offline Server status and common buttons.
A quick tour of the Q-Booth window: the main menu, the Home dashboard, the status boxes at the bottom of the menu, and the buttons and shortcuts you will use everywhere. Read this once and every other article will be easier to follow.

The main window
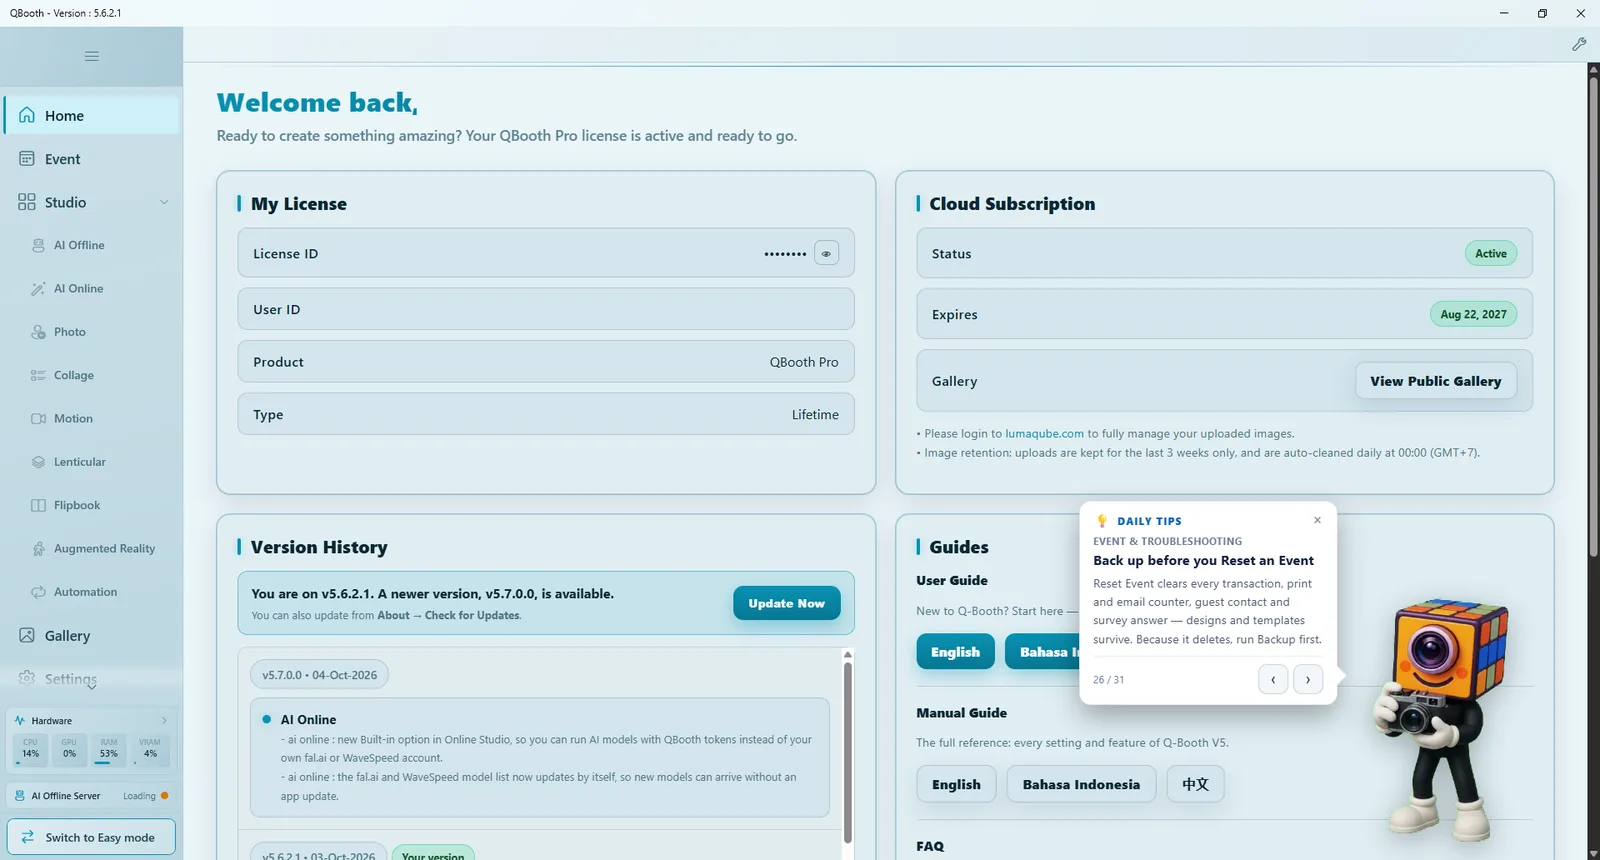
The window has three areas:
- Title bar — shows the installed version (useful when you contact support).
- Main menu (left) — the modules, plus the status boxes and the mode switch at the bottom.
- Content area (right) — whatever module is open.
The main menu
| Item | What it opens |
|---|---|
| Home | The dashboard (see Home below). |
| Event | The event list, where you create, edit and launch events. |
| Studio | The studios where templates are designed: AI Offline, AI Online, Photo, Collage, Motion, Lenticular, Flipbook, Augmented Reality, Automation. Only the studios in your edition are listed. |
| Gallery | Every result and camera photo on this computer. |
| Settings | The App Settings window. |
| About | Version, updates and license (see Installation). |
The Studio group can be expanded or collapsed with the arrow next to it. In Settings › General you can choose how it behaves (Studio Navigation: Show in sidebar lists every studio in the menu, Select studio dialog opens a picker instead) and which side of the window the menu sits on (Menu Position).
The hamburger button
The three-line button at the top of the menu collapses the menu to icons only, leaving more room for design canvases. Click it again to expand. While the menu is collapsed, clicking Studio always opens the studio picker dialog.
Hardware box
Near the bottom of the menu, the Hardware box shows live CPU, GPU, RAM and VRAM use. Click it to see more detail. If processing feels slow or a long event starts to lag, check it first.
AI Offline Server status
Editions with AI Offline show the AI Offline Server status under the hardware box. It tells you whether the local AI engine is ready:
| Status | Meaning |
|---|---|
| Loading | The AI engine is starting. This can take from a few seconds up to a minute or two after Q-Booth opens. |
| Online | Ready. You can process AI Offline templates. |
| Offline | Not running. AI Offline templates such as Imagine, Re-Imagine and Composite cannot be processed. |
Face Swap uses a separate process and works even when this status is not Online. If the status stays offline, check Compute Device in Settings › Advanced (see Advanced settings).
Jobs counter
Q-Booth runs some work in the background, such as uploads. If you turn on Show in main menu for quick access in Settings › Other, a Jobs counter appears above the hardware box with the number of pending and failed jobs. Click it — or press Ctrl + Shift + J anywhere — to open the Job Monitor.
Easy / Expert mode switch
The button at the very bottom of the menu switches the interface: Switch to Easy mode or Switch to Expert mode. Easy Mode shows a shorter menu (Home, Event, Gallery, Settings, About) and builds events with a step-by-step wizard. See Easy Mode and Expert Mode.
Home
Home is the dashboard you see when Q-Booth opens. In Expert Mode it has these panels:
| Panel | What it shows |
|---|---|
| My License | License ID (hidden — click the eye icon to reveal it), User ID, Product and Type. |
| Cloud Subscription | Status and expiry date of cloud sharing, and View Public Gallery. Uploads are kept for the last three weeks and cleaned up automatically every day. |
| Version History | Release notes for each version. When a newer version exists, a banner with Update Now appears at the top. |
| Guides | Links to the User Guide, the Manual Guide (in several languages) and the FAQ. |
| How to Transfer Your License | The two ways to move a license to another computer (see Moving to another computer). |
A Daily Tips card may also pop up with a practical tip; use the arrows to browse tips or close it.
Home is displayed with the Microsoft WebView2 component. If Windows is missing it, Home shows Additional Component Required with an Install WebView2 Runtime button. Click it, then Retry.
In Easy Mode, Home asks What are you running today?: click Create under New Event to start the wizard, or pick one of your Created events and click Start. Each event card also offers Edit, Duplicate, Gallery and Delete.
The event list
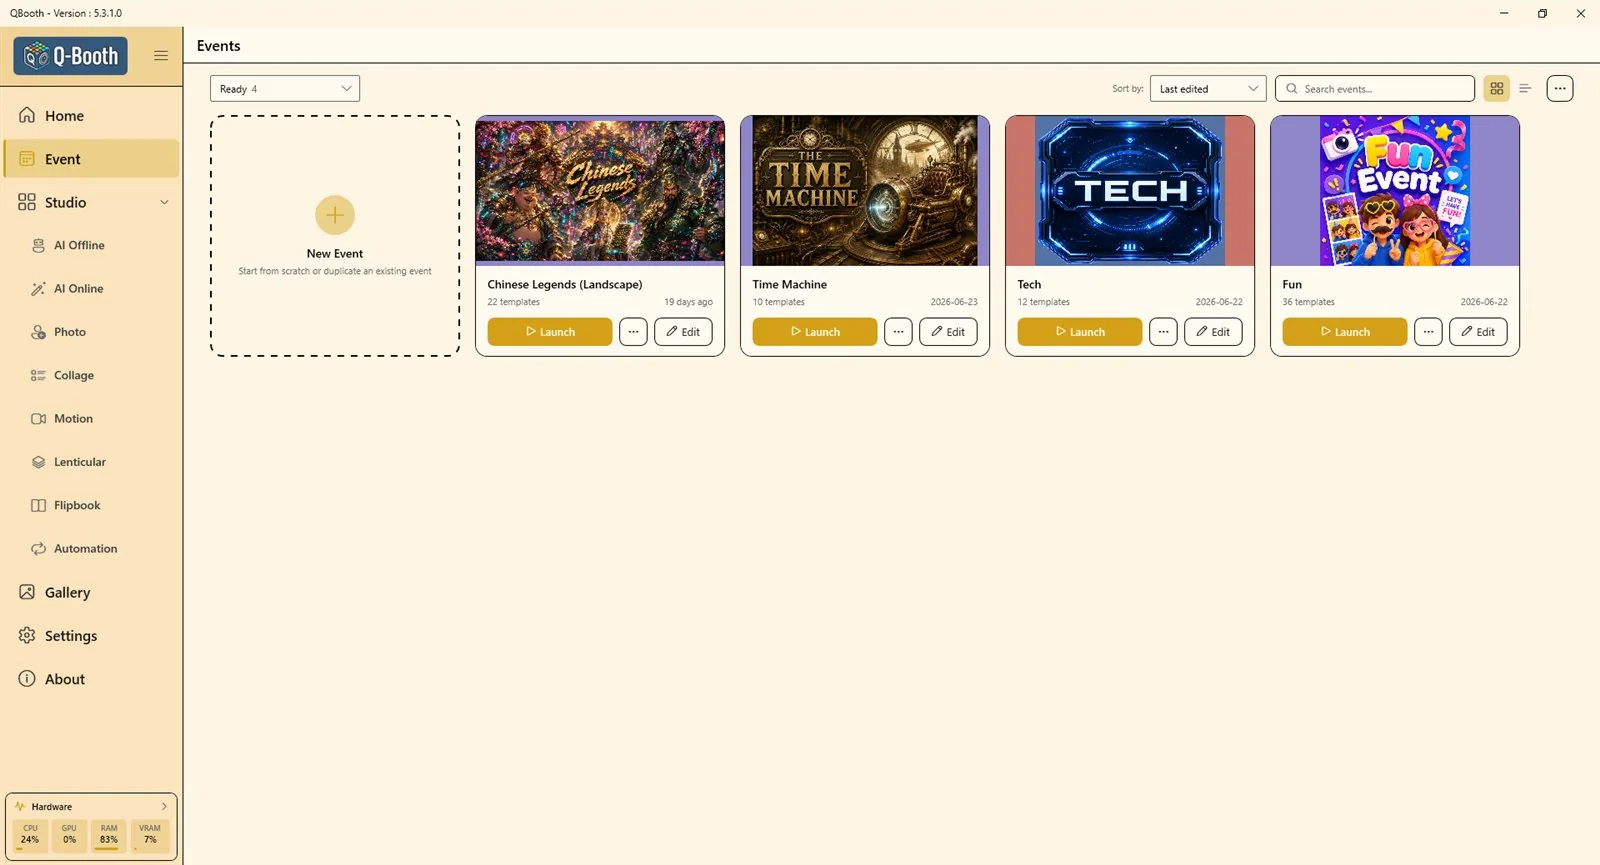
Click Event in the menu to see your events. The first card is always New Event. Use the status filter (Ready, Archived, Trash), Sort by:, the search box and the card/list buttons at the top. Each event card has Launch, Edit, and a "…" menu with more actions such as Duplicate, Export and Delete. The full guide is in Events overview.
Editors and their common buttons
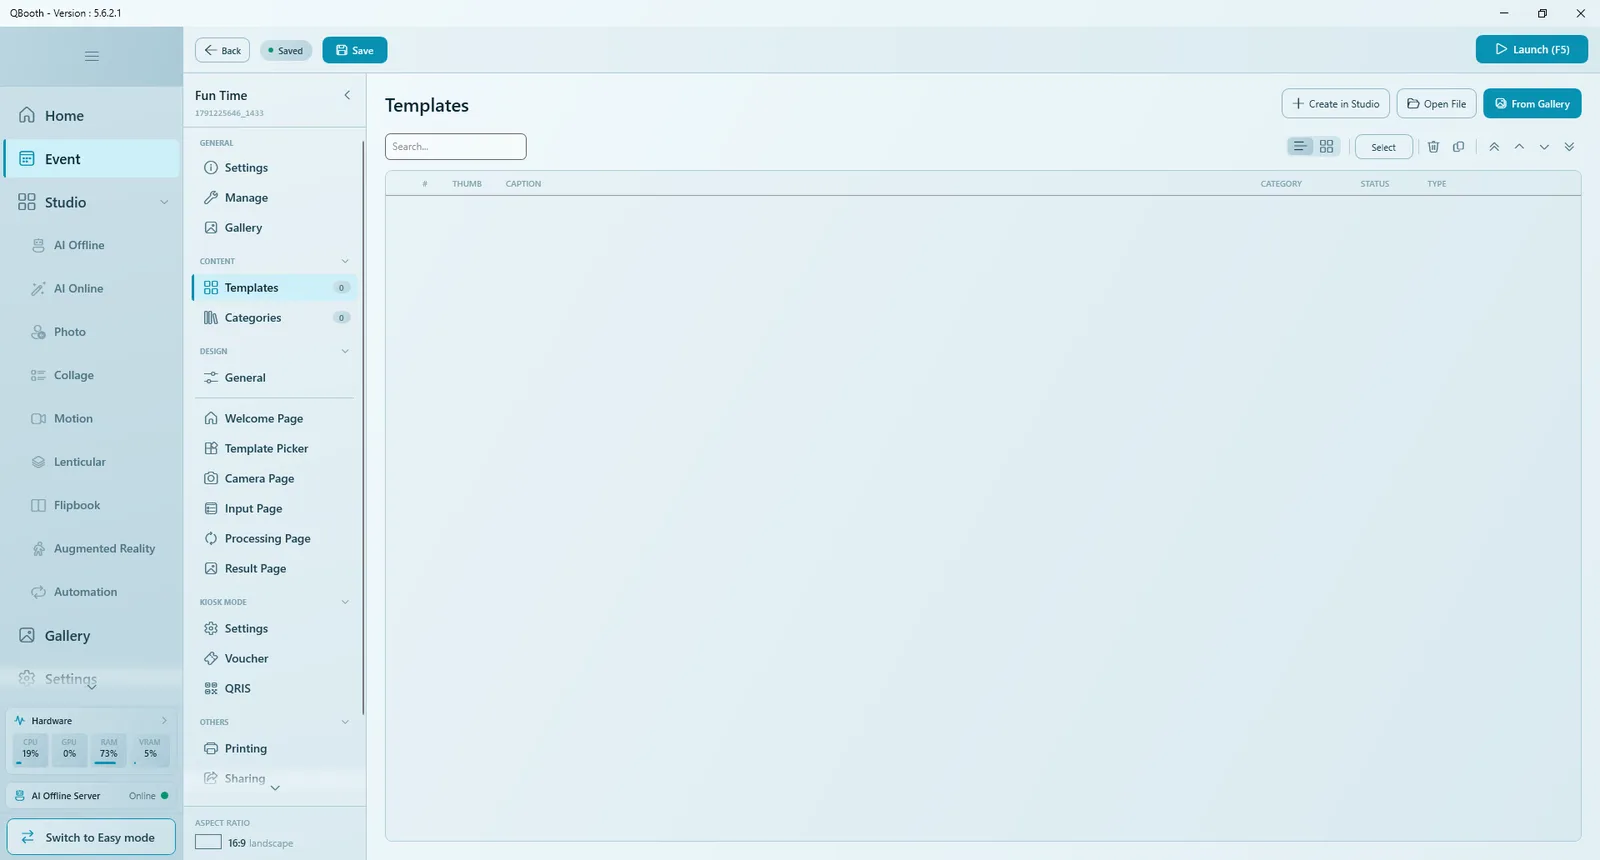
Event Editor
- Back — returns to the event list. If there are unsaved changes, Q-Booth asks whether to discard them.
- Saved / Unsaved — tells you whether everything is stored on disk.
- Save — saves the event.
- Launch (F5) — runs the event full screen.
- The section list on the left is grouped into GENERAL, CONTENT, DESIGN, KIOSK MODE and OTHERS. Each page designer has Preview (F9), and the Camera Page also has Simulate (F10).
Studios
All studios share the same layout: settings groups on the left (starting with TEMPLATE, where you open and save the template file), studio-specific options in the middle, the source image and result on the right, and Reset, Process (F5) and Share along the bottom. A studio opened from inside an event shows Save & Return at the top of the left panel instead of a normal save. See Studio basics.
Settings window
Settings opens the App Settings window with the sections General, Hardware, Overlay & Filters, QR Share, Other and Advanced. Changes apply only when you click Save Settings; Cancel discards them.
Keyboard shortcuts
| Shortcut | What it does |
|---|---|
| F5 | Launch the event (Event module) or Process (inside a studio). |
| F9 | Preview the page you are designing. |
| F10 | Simulate a capture session on the Camera Page. |
| Shift + F4 | Exit a running event (or double-click the top-right corner of the screen). |
| Shift + F2 | Open the gallery from a running event, when allowed (or double-click the top-left corner). |
| Ctrl + Shift + J | Open the Job Monitor from anywhere. |
Esc does not close a running event — it is disabled on purpose so guests cannot leave the booth. Use Shift + F4 or a double-click on the top-right corner.
Changing the look
In Settings › General under Appearance you can change Language, Theme Color, Theme Style and UI Size (Standard, Big, Huge). Most changes apply immediately; after changing Theme Style, a few buttons refresh only when you reopen the window. Details are in General settings.
Next steps
Still need help?
Our team answers on WhatsApp. Tell us your Q-Booth version and what you see on screen.