Photo & strip with BTS (live mode) in Easy Mode
Make a single photo or a photo strip with a frame in Easy Mode, and add the BTS behind-the-scenes video guests call live mode.
A single photo or a photo strip with a frame, plus a short moving clip of the guests posing: the BTS (behind-the-scenes) video, which many people call live mode or a live photo. In Easy Mode you set it up in a couple of minutes, without opening a studio.
Before you start
- Q-Booth is in Easy Mode (the button at the bottom left reads Switch to Expert mode).
- A camera is connected and shows a live view (see Camera settings).
- Have your frame ready: a PNG with transparent holes where the photos go, in the shape of the print (for example 1200 × 1800 for a 4×6, 600 × 1800 for a 2×6 strip).
Which card to use
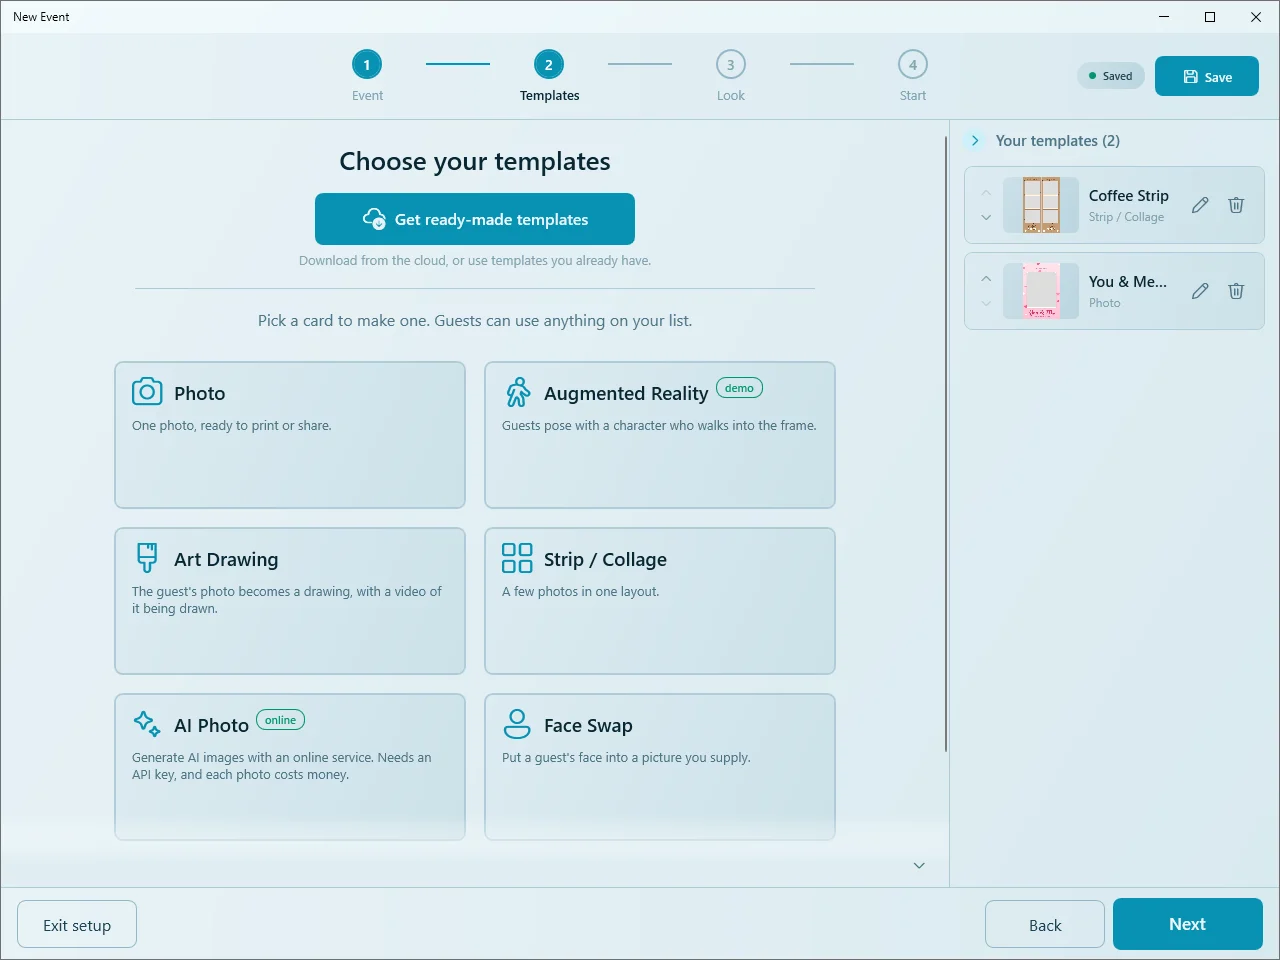
In the event wizard, step 2 Templates shows the cards. Two of them make plain photos:
| Card | What it makes | BTS / live mode |
|---|---|---|
| Photo | One photo, a size and a frame over it. Nothing else. | No |
| Strip / Collage | 1 to 6 photos in one layout, with a frame, placed where you drag them. | Yes |
The Photo card has no BTS switch. For one photo with a BTS video, use the Strip / Collage card and set Photos to 1. Guests still see it as a normal photo template: it is listed as Photo.
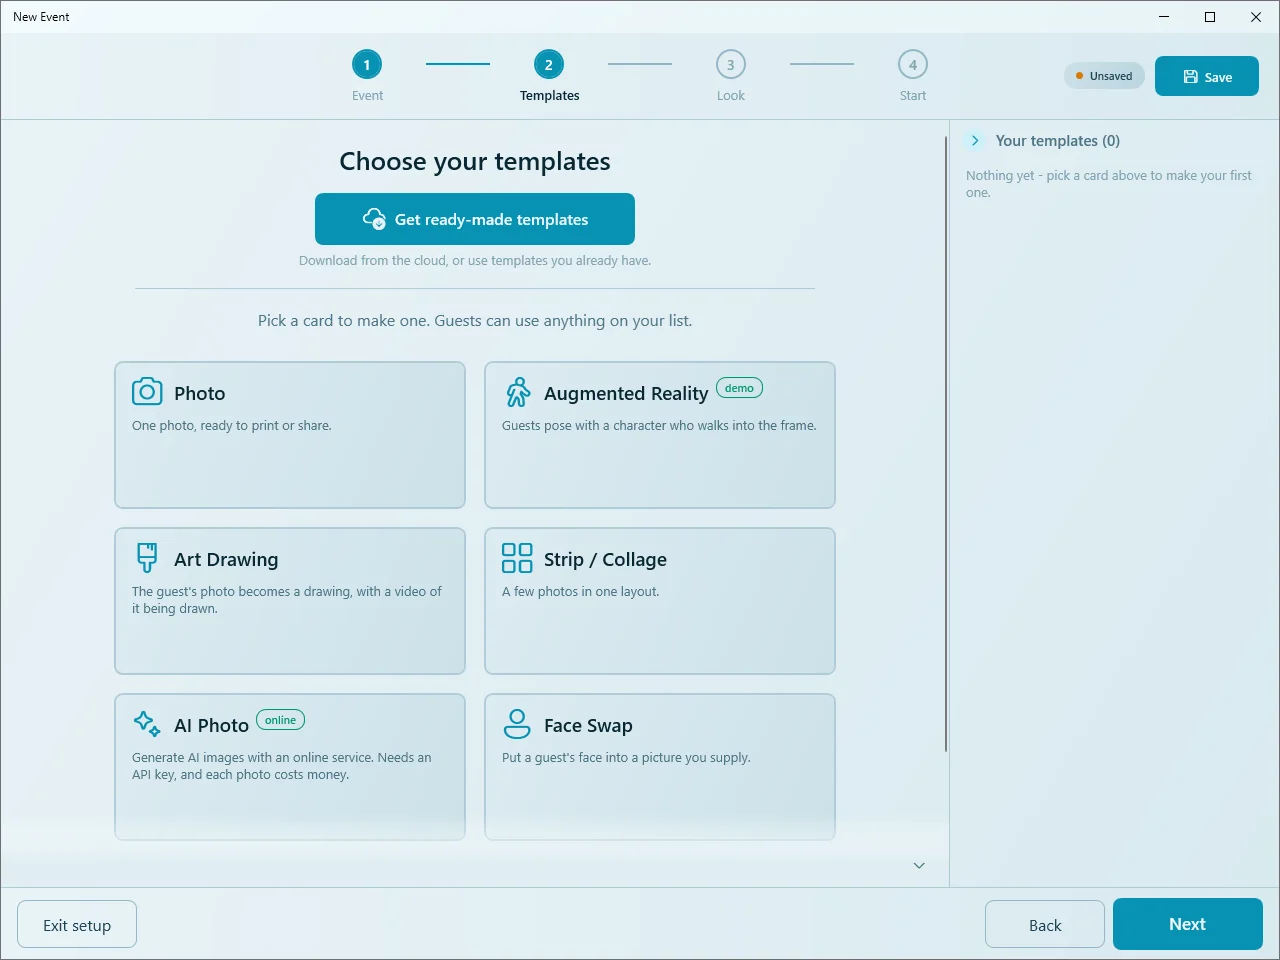
Open the Strip / Collage card
- Click Event in the side menu. Press Create on the New Event card, or Edit an event you already have.
- Go to step 2, Templates.
- Click Strip / Collage. The Make a strip or collage window opens. It starts as a classic strip: 2:6 Strip, 3 photos, Double.
Example 1: a photo strip with BTS
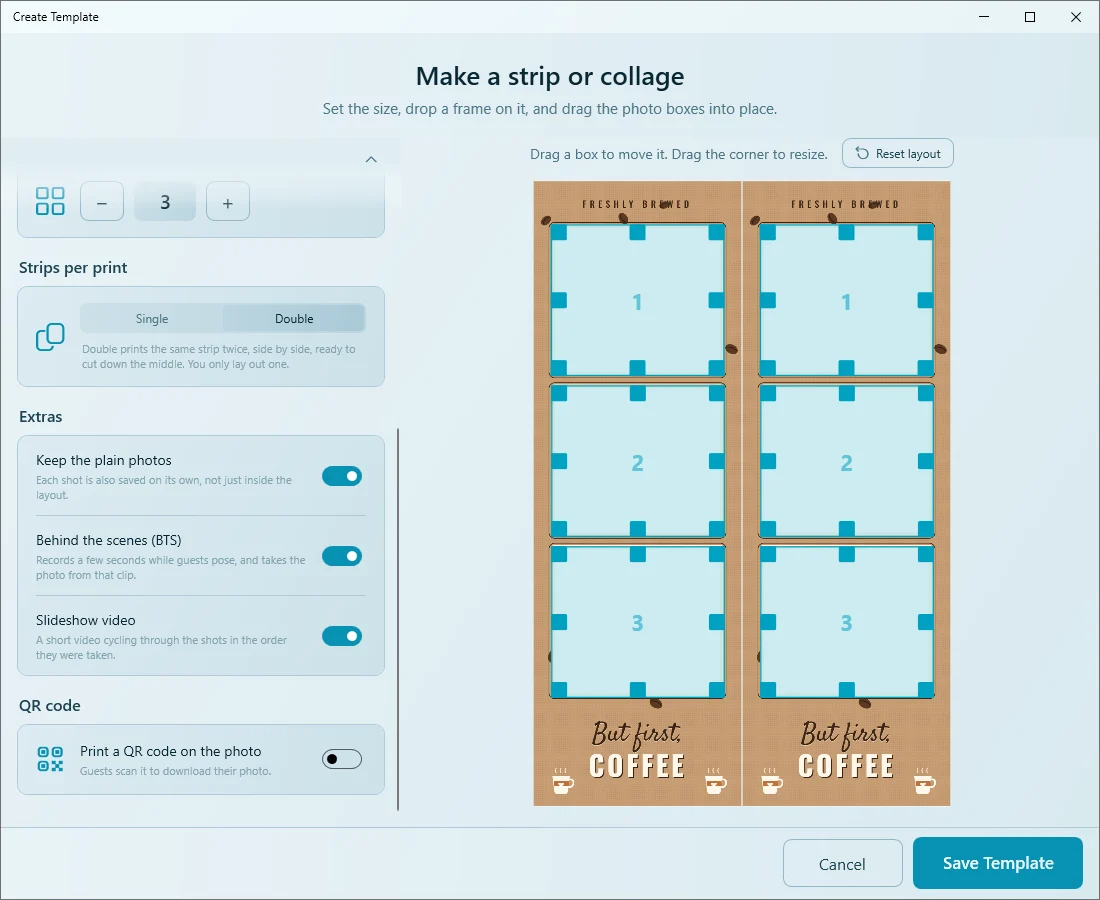
- Template name: type a name guests will read, for example Coffee Strip. The cover is made automatically from the layout; click the cover box to use your own picture instead.
- Size: keep 2:6 Strip.
- Frame: click Choose File..., then File, and pick your strip PNG. A see-through PNG is laid over the photos; a solid picture goes behind them. Q-Booth works that out by itself.
- Photos: use − and + to match the holes in your frame (3 here).
- In the preview on the right, drag each numbered box onto its hole, and drag a corner to resize it. Reset layout puts the boxes back in a neat stack.
- Strips per print: Double prints the same strip twice on one 4×6, ready to cut down the middle. You only lay out one.
- Under Extras, turn on Behind the scenes (BTS).
- Click Save Template.
Example 2: a single photo with BTS (live mode)
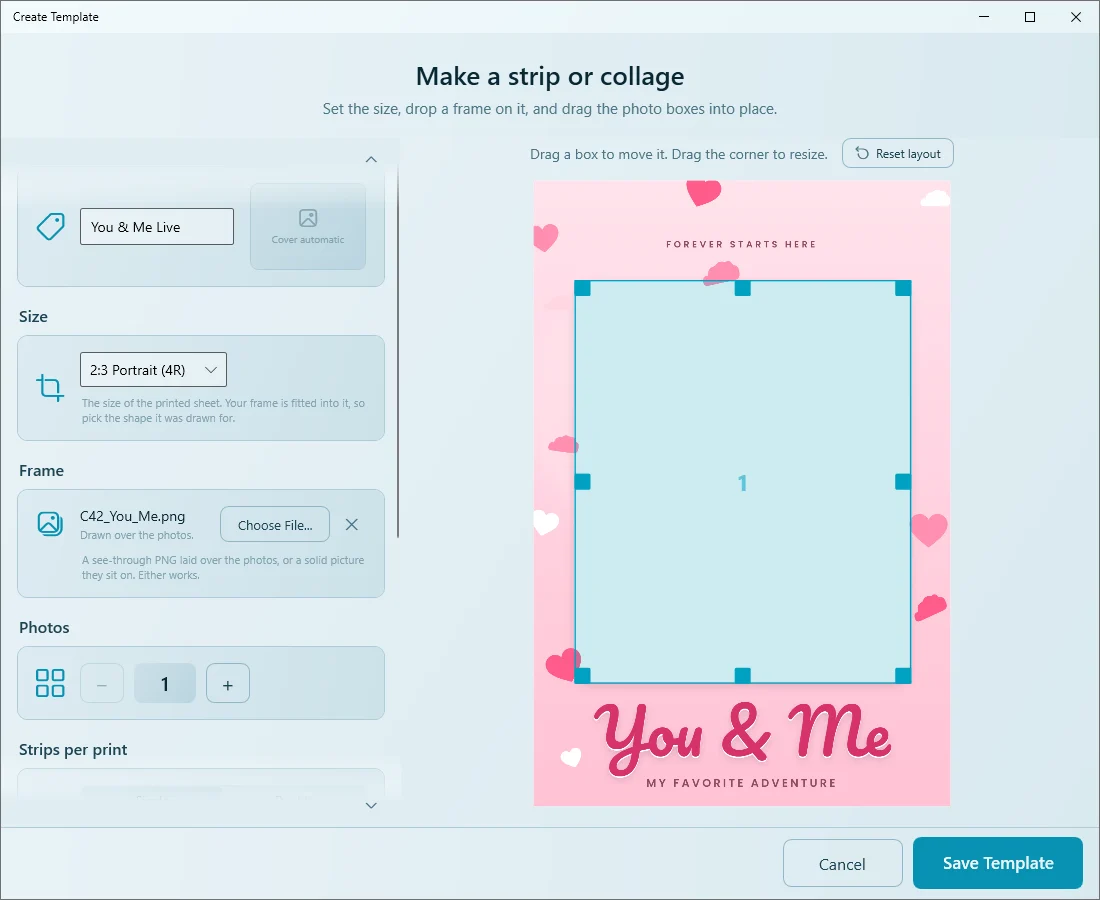
- Click the Strip / Collage card again and type a name, for example You & Me Live.
- Size: choose 2:3 Portrait (4R) for a 4×6 print (or the shape your frame was drawn for).
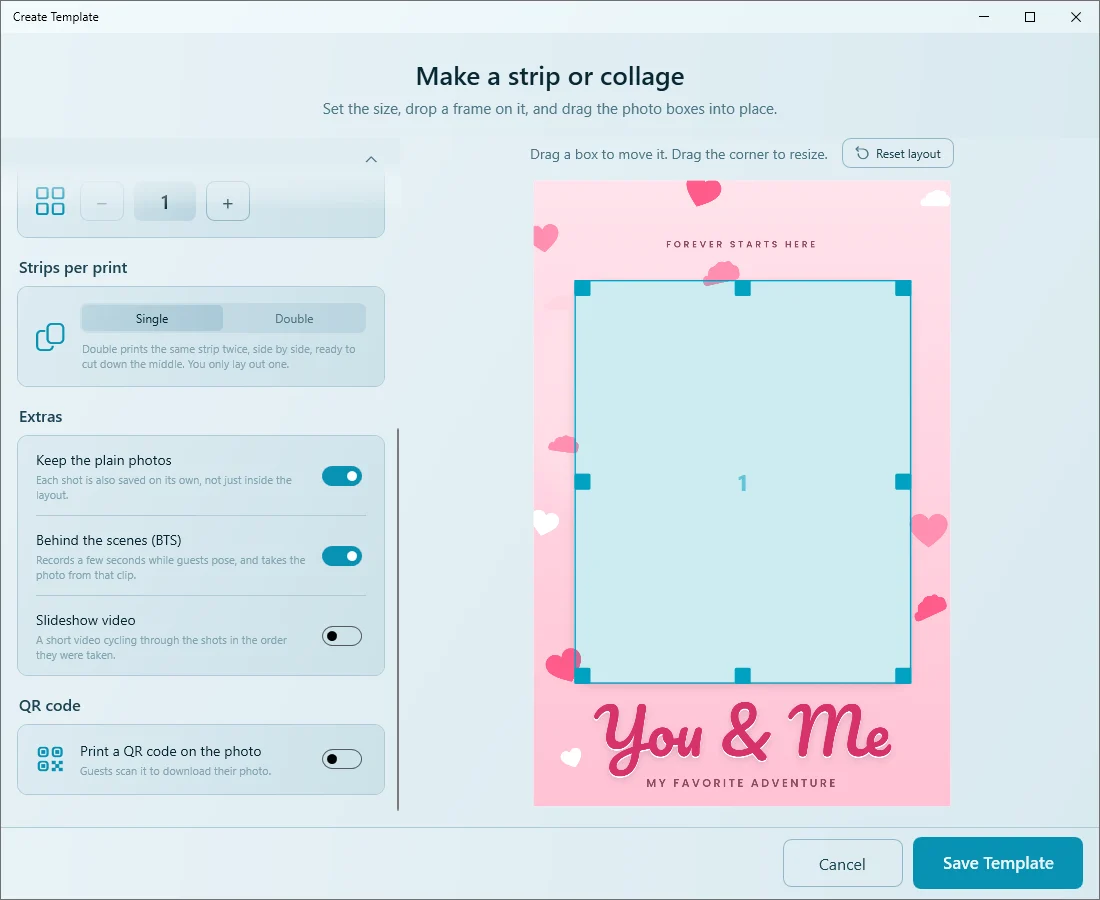
- Strips per print: choose Single.
- Photos: press − until it shows 1.
- Frame: choose your PNG, then drag and resize box 1 so it covers the frame's window.
- Under Extras, turn on Behind the scenes (BTS). Turn Slideshow video off: with one photo there is nothing to cycle through.
- Click Save Template.
The Extras switches
| Switch | What guests get | Starts |
|---|---|---|
| Keep the plain photos | Each shot on its own as well, not only inside the layout. | On |
| Behind the scenes (BTS) | The live-mode video: the same layout and frame, with each box playing a short clip of the guests getting ready. | Off |
| Slideshow video | A short video cycling through the shots in the order they were taken. | On |
| Print a QR code on the photo | A QR code on the print to download the photo. Drag it on the preview to place it. | Off |
How BTS works at the booth
- The camera records the last 3 seconds of the countdown, while the guests get ready. A small blinking dot shows while it records. If the event's countdown is shorter than 3 seconds, it runs for 3.
- At zero the recording stops and the photo is taken as usual. The print is always that photo, so it keeps the camera's full quality.
- The clip has no sound. The camera filter the guest picks is applied to the clip as well.
- In a strip, every shot gets its own clip, and the video plays them together in their boxes. With Double the video shows both strips, like the print.
- The Live View on/off button is not offered on the camera page for these templates: the live view has to run to record.
- If the photo fails, the guest still gets the clip.
Your templates
Saved templates appear under Your templates on the right. A strip is marked Strip / Collage, a one-photo template Photo. Use the pencil to edit, the bin to remove, and the arrows to change the order. Click Next to continue with Look and Start, and Save the event.
What guests get
- The guest taps the template on the start screen. The countdown runs and the photos are taken, one per box.
- On the Result page they step through the results with the arrows: the photo or strip, the BTS video, then the plain photos and the slideshow if those are on.
- The print is the photo. The QR code takes the results home on their phone.
For the full event flow see Run an event.
More control in Expert mode
In Easy Mode the BTS clip is always 3 seconds. A template made with the Strip / Collage card is a normal Collage Studio template. Click Switch to Expert mode, open it, and in Options › Behind The Scene (BTS) set Video duration (sec). Collage Studio also adds text, a QR code layer, AI photos and more; see Collage Studio.
Tips
- Tell guests to start moving during the countdown, not only at the end: that is what the video catches.
- BTS adds a few seconds of processing for the video, more on a long strip. Test with the real camera before the event.
- Draw the frame in the same shape as the Size, and fit every box to its hole before saving.
Common problems
I cannot find the BTS switch.
It is not on the Photo card. Use Strip / Collage, with Photos set to 1 for a single photo.
Guests get the photo but no video.
Check that Behind the scenes (BTS) is on: edit the template with the pencil. Then check that the camera shows a live view; the clip is recorded from it.
Heads are cut off, or the photo shows outside the frame.
The box does not match the frame's hole. Edit the template and drag and resize the box onto the hole.
The countdown feels longer.
BTS needs at least 3 seconds of countdown to record. A shorter countdown is stretched to 3 seconds.
Next steps
Still need help?
Our team answers on WhatsApp. Tell us your Q-Booth version and what you see on screen.