Quick Start: Your First Event
Go from zero to a running booth: create an event, add templates, set the look, test it and launch it.
From zero to a running booth: this walkthrough creates an event, adds a template, sets the look, tests everything and launches the booth for guests. Use Easy Mode for the fastest route, or Expert Mode for full control — both are covered below.

Before you start
- Q-Booth is installed and activated (see Installation).
- Your camera is connected and tested, and ideally the printer and sharing too (see First-time setup).
- You know the screen shape of the booth: landscape or portrait.
Remember the core idea: an event is what runs at the booth, and it is filled with templates made in the studios. An event with no templates cannot be launched. See Events and Studios.
Route 1: Easy Mode wizard (fastest)
If the button at the bottom of the main menu says Switch to Easy mode, click it first.
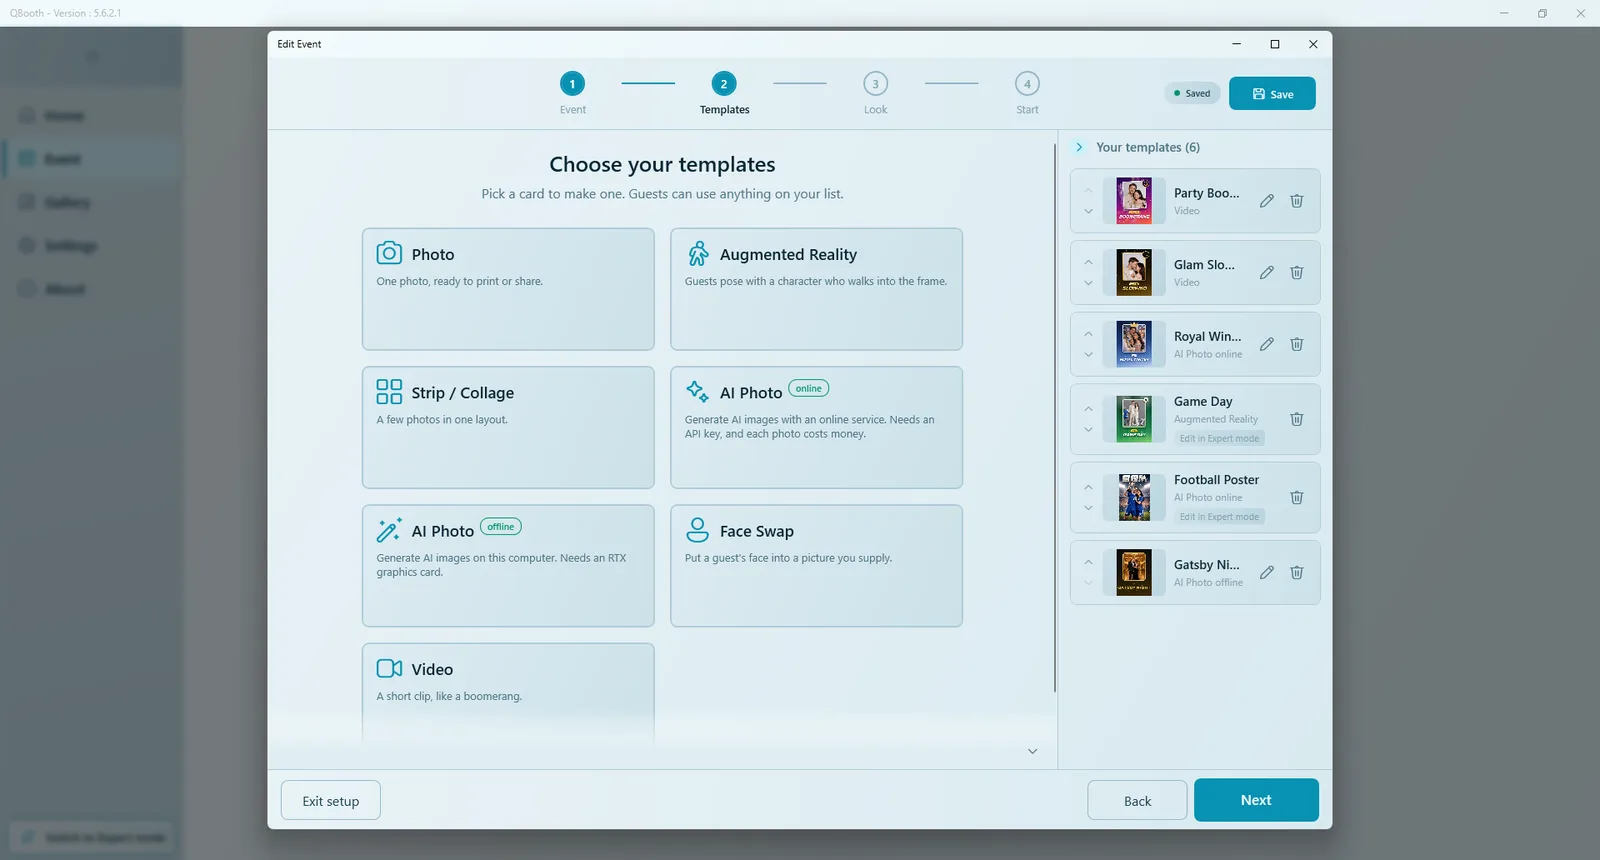
- On Home, under New Event, click Create. The wizard opens with four steps: Event, Templates, Look, Start.
- Event: type the Event name, choose the Screen shape (Landscape or Portrait), optionally add a Cover image, and click Next.
- Templates: pick a card to make a template — for example Photo. Set its size, choose a frame (a PNG with a transparent area where the photo shows through) if you want one, and click Save Template. Repeat for more templates, such as a Strip / Collage or a Face Swap. Your templates appear in the list on the right. Click Next.
- Look: choose a Background (an image or a plain colour) for every screen, then click any screen to change its texts, fonts and colours. Everything here is optional — the defaults already work. Click Next.
- Start: check that the camera, printer and monitor are set. If something shows Not set, click Open Settings.
- Read How to get back out, then click Start Booth. The event runs full screen.
Next time, start the same event from Home: pick it under Created events and click Start. Now jump to Test the booth.
Route 2: Expert Mode
Step 1 — Create the event
- Click Event in the main menu, then click the New Event card.
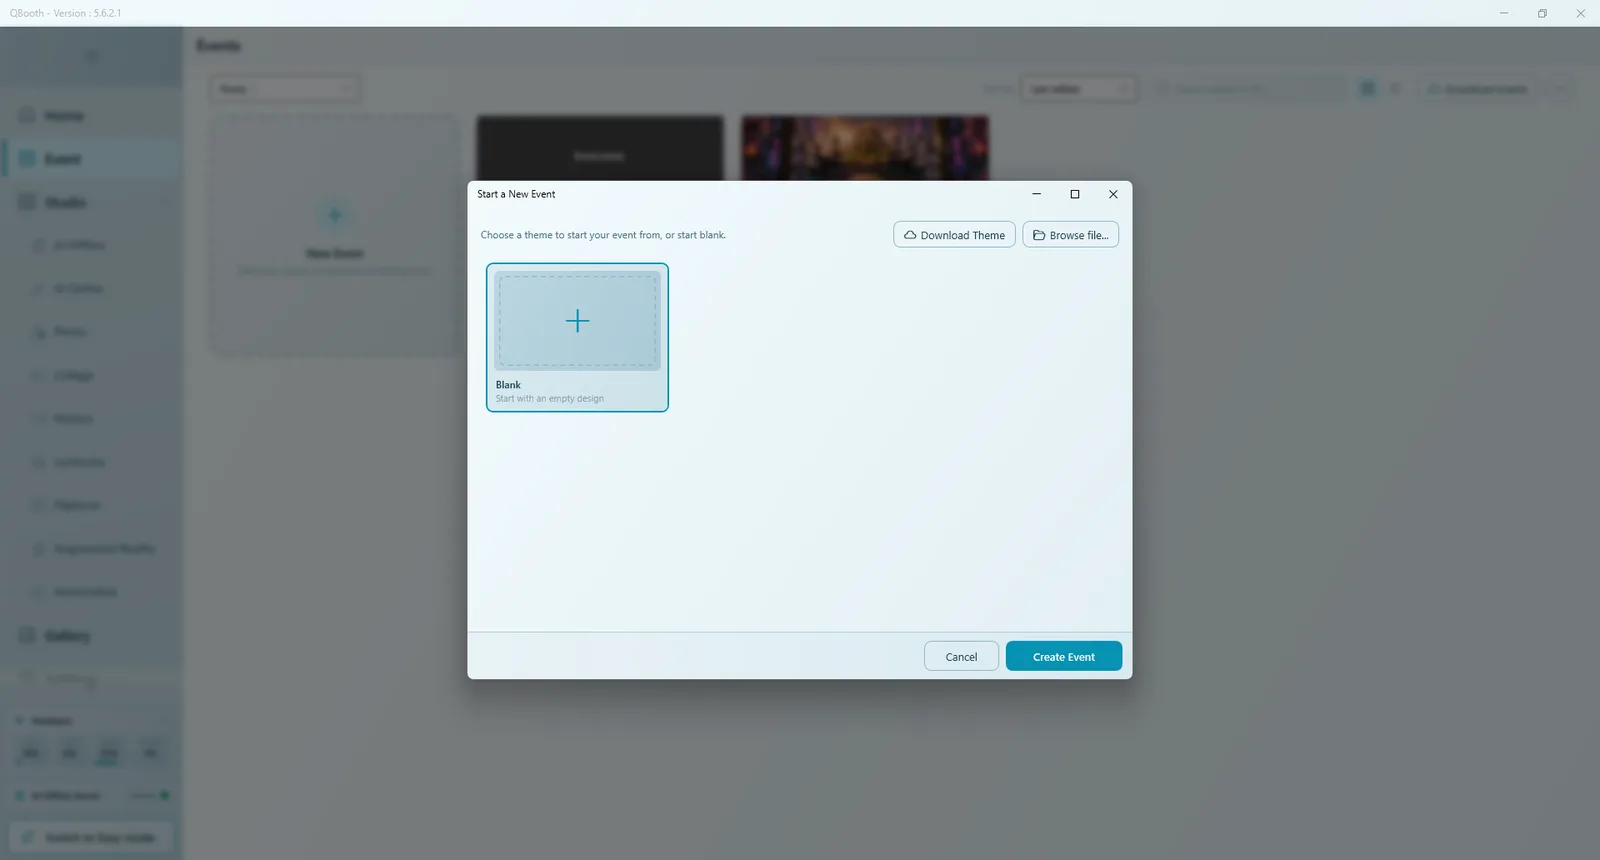
- In Start a New Event, pick Blank or a ready-made theme. A theme fills every kiosk screen with a finished design, which is the quickest way to a good-looking booth.
- Click Create Event (or double-click the card). The Event Editor opens on GENERAL › Settings.
- Type the EVENT NAME, optionally choose a cover image, and pick the ASPECT RATIO that matches the booth monitor (for example 16:9 landscape or 9:16 portrait) and the output monitor.
A new event is not written to disk until you click Save for the first time. The Survey and Report sections also appear only after the first save.
Step 2 — Add a template
- Open CONTENT › Templates. Three buttons appear at the top: Create in Studio, Open File and From Gallery.
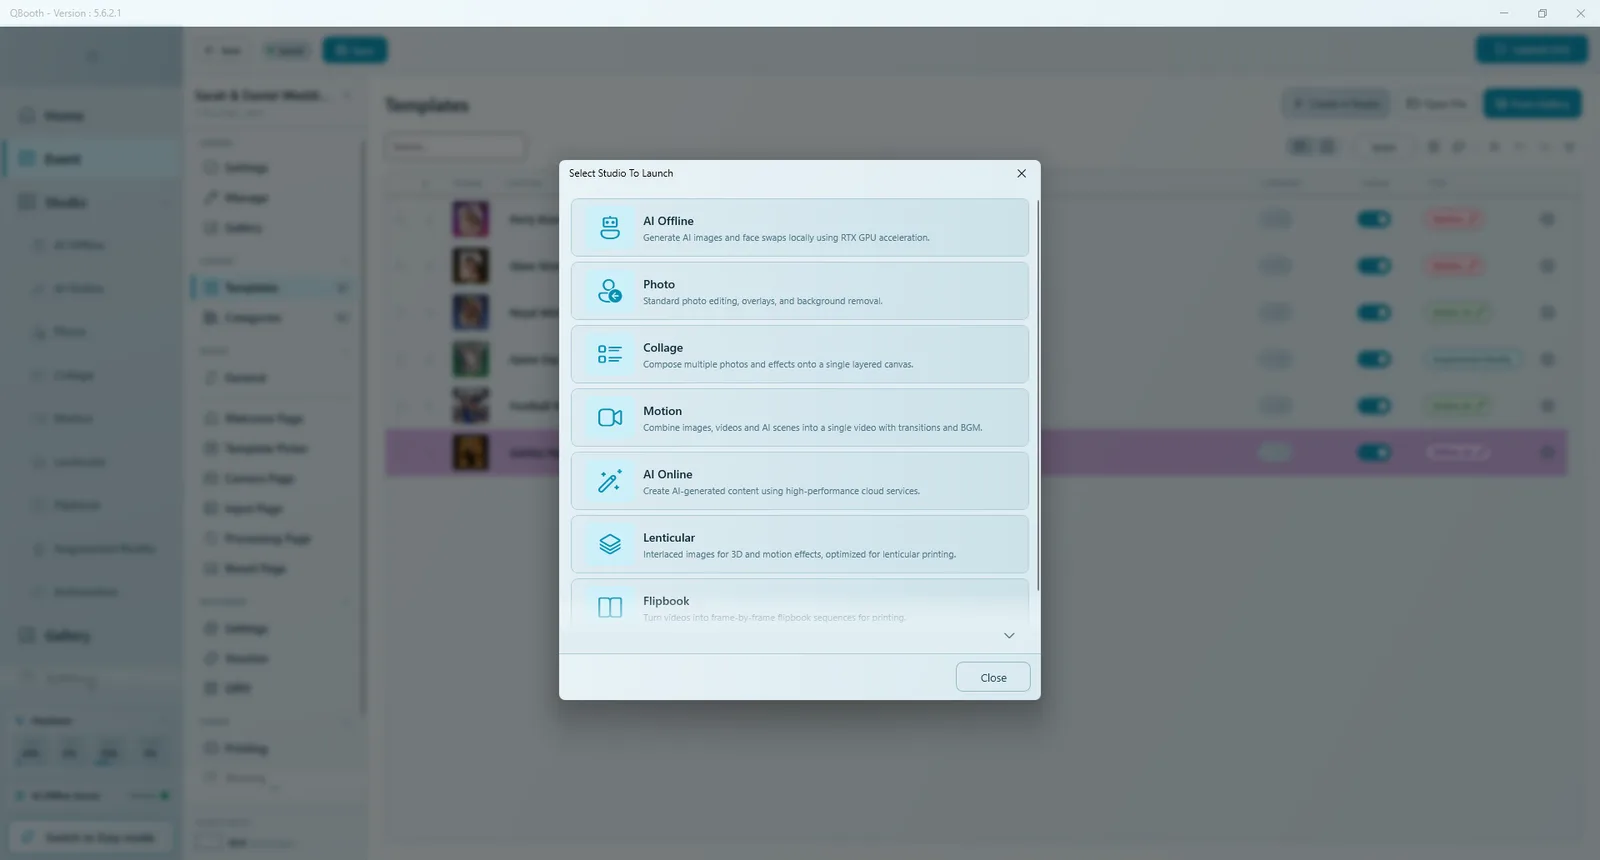
- Click Create in Studio. The Select Studio To Launch dialog lists the studios your edition allows. For a first event, pick Photo — it is the simplest.
- The studio opens in its own window. Set the ratio and frame, check the result with Process (F5), then click Save & Return at the top of the left panel.
- The template appears as a new row in the Templates list. Click Save in the action bar — the indicator changes to Saved.
Already have template files, or want ready-made ones? Use Open File (several files at once) or From Gallery. Use Create in Studio for one-off templates, and build reusable templates from the Studio menu instead. Everything about templates is in Templates.
After Save & Return, always click Save in the Event Editor too. The new template is stored in the event only when the event itself is saved.
Step 3 — Check the look
If you started from a theme, every screen is already designed. To adjust it, open any page under DESIGN — for example the Welcome Page — change texts, images and buttons, and press Preview (F9) to see the page as guests will. The guests see these pages in order: Welcome, Template Picker, Camera, Processing and Result. See Page designer.
Step 4 — Decide how guests get their photos
- In GENERAL › Settings, RESULT DELIVERY decides whether guests get their result on screen, by email or later. See Event settings.
- Under OTHERS, Printing sets automatic printing, print limits and the printer, and Sharing sets the QR code and email options. See Sharing & printing.
- The delivery methods themselves (cloud or FTP for Web QR, SMTP or API for email) are set once in Settings › QR Share.
Test the booth
Q-Booth has three ways to "run" something. Use them in this order:
| Tool | Where | What it tests |
|---|---|---|
| Preview (F9) | Every page designer | The look of one page — no camera, no real session. |
| Simulate (F10) | Camera Page only | The whole capture flow — countdown, multi-shot, retake, filters — with sample photos instead of a real camera. |
| Launch (F5) | Event list or Event Editor | A real session: real camera, real processing, real print, QR and email. |
Launch (F5) runs whatever is in the editor, including unsaved changes, but it does not save them. When a test run looks right, go back and click Save.
Launch the event
- Click Launch (F5) in the Event Editor, or Launch on the event's card in the event list. (In Easy Mode, Start Booth or Start does the same.)
- After a short preparation pause, the event fills the screen on the selected monitor. If the event has no templates, Q-Booth stops and warns you.
- Do one full session as a guest would: tap to start, choose a template, pose for the countdown, check the result, and print or scan the QR code.
The guest flow is: Welcome → (Survey, if any) → (Category Picker, if used) → Template Picker → Camera → (Input, if enabled) → Processing → Result.
Exit the event
- Press Shift + F4, or double-click (double-tap on a touch screen) the top-right corner of the screen. If an exit PIN is set, enter it.
- To open the gallery of the event's photos while it runs, double-click the top-left corner or press Shift + F2 (when allowed).
- Esc does not work on purpose, so guests cannot leave the booth.
To stop guests from leaving with Alt + Tab or the Windows key, and to require a PIN to exit, see Running an event.
Before the event day
- Run one complete session with Launch and print one real copy.
- Save the event, then make a design backup with Export Event from the event's Manage section.
- At the venue, retest the camera, a test print, Test QR and Test Send on the venue network.
The full list is in the Event checklist.
Next steps
Still need help?
Our team answers on WhatsApp. Tell us your Q-Booth version and what you see on screen.