Flipbook Studio
Turn a short video into printed flipbook pages, then cut, stack and bind them into a book guests can flip.
Flipbook Studio turns a few seconds of video into printed pages. Cut them, stack them, clip them together, and guests have a little book they can flip again and again. This page covers the template settings, the video source, the cover, processing, and the physical cutting and binding.

Chapters (20)
- 0:00Intro
- 0:14What you need
- 0:25Open Flipbook Studio
- 0:35Where the frames come from
- 0:49Aspect ratio & record duration
- 1:05Playback mode & speed
- 1:17Paper & composition
- 1:34FPS: the number that matters
- 1:55Binder & cut lines
- 2:16Image size: Crop
- 2:30Cover image
- 2:42Overlay
- 2:54Save & record
- 3:13The result & printing
- 3:34Cut
- 3:47Stack, bind & flip
- 4:09Studio Template as the source
- 4:22A photo becomes a flipbook
- 4:32At an event
- 4:45Three things to remember
Before you start
- A photo printer and paper, for example 4 × 6 inch.
- A paper cutter. A guillotine cutter gives the cleanest, most even edges.
- A binder clip, a stapler or a strip of tape.
- A camera set up in Settings › Camera if guests record at the booth.
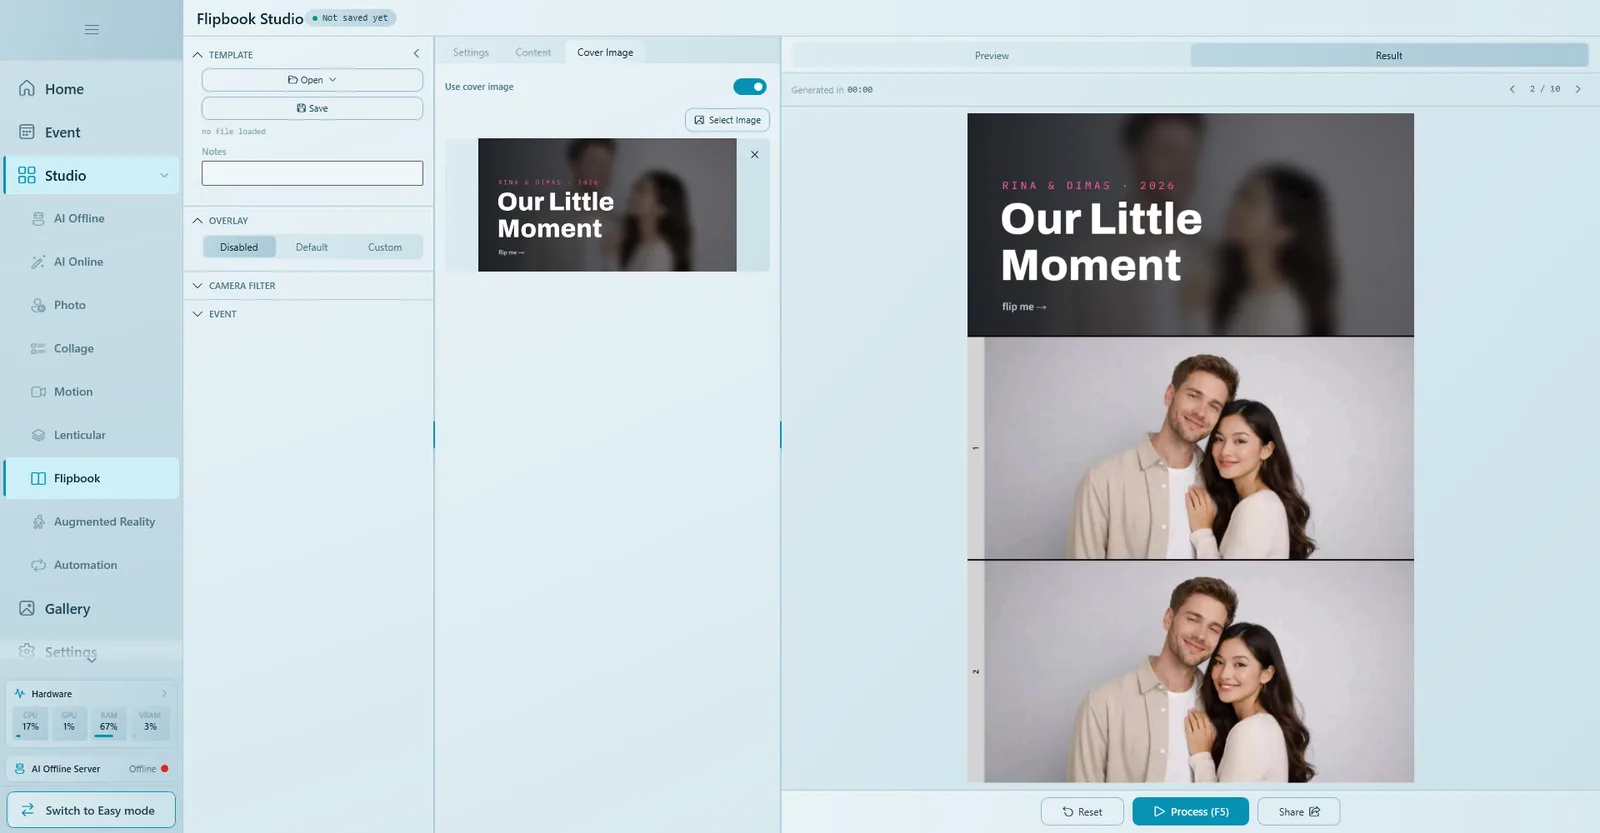
Open Studio › Flipbook. Templates and overlay are on the left, the Settings, Content and Cover Image tabs are in the middle, and a live preview of the printed page is on the right.
How the page count works
Q-Booth takes frames from the video at the Frame Per Second rate and places them on pages in a grid (Composition). So:
- Frames = video length (seconds) × frames per second.
- Pages = (frames + cover, if any) ÷ frames per page, rounded up.
Example: 5 seconds × 5 fps = 25 frames. Add a cover = 26 cells. With 3 frames per page that is 9 pages. At 10 fps it becomes 50 frames and 17 pages. The Content tab always shows the current estimate, for example Estimated Pages: 9 (25 frames @ 5fps).
More frames give smoother motion, but a thicker book and more cutting. For most events, 5 seconds at 5 fps is a good balance.
Settings tab
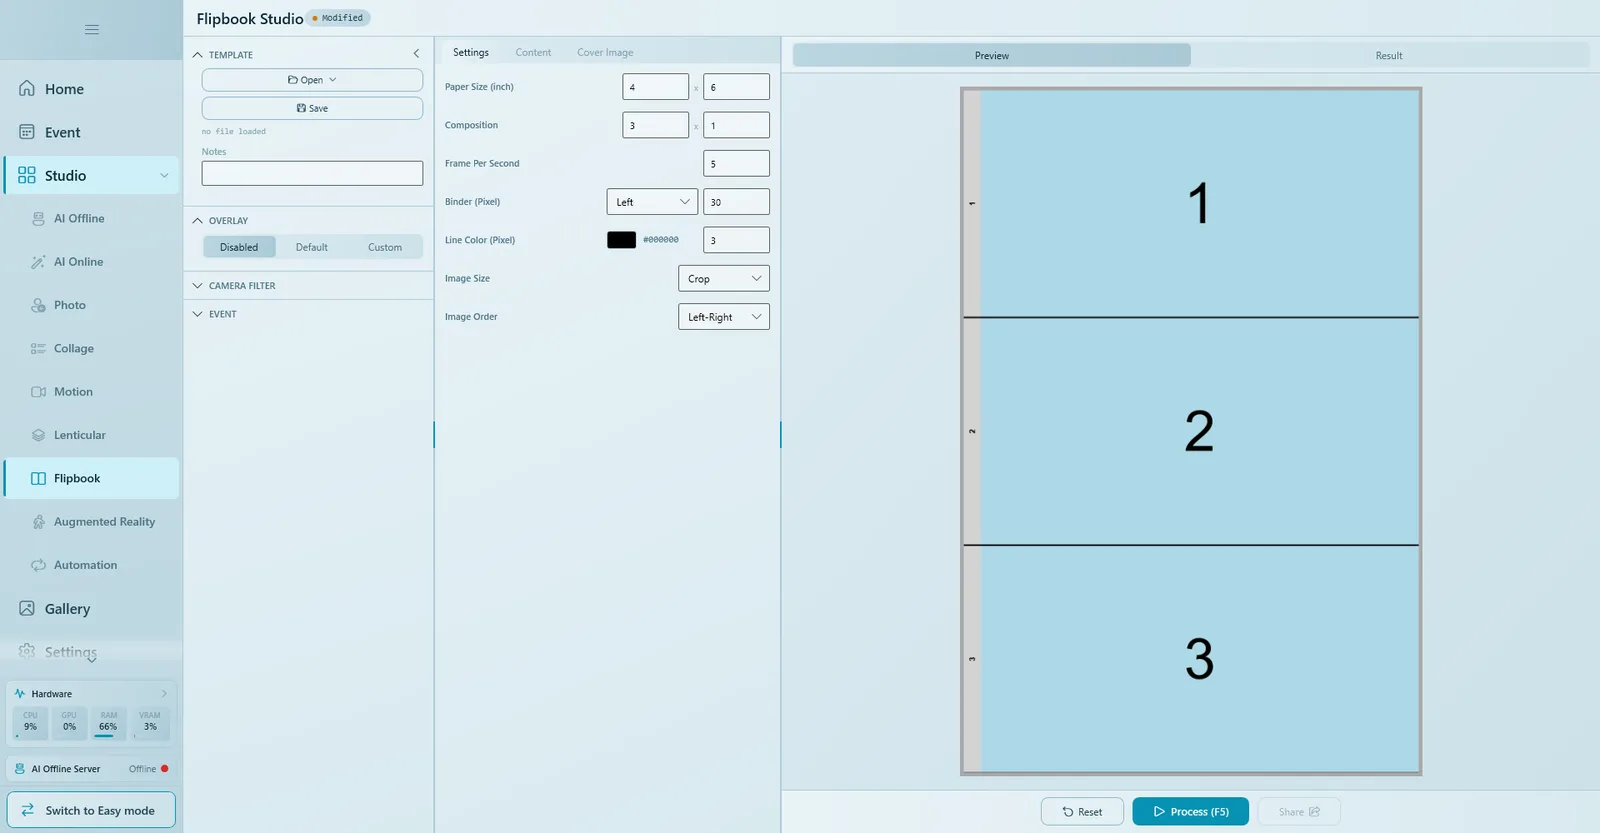
| Setting | What it does |
|---|---|
| Paper Size (inch) | Width × height of the sheet you print on, for example 4 × 6. |
| Composition | Rows × columns: how many frames fit on one sheet. 3 × 1 on 4 × 6 paper gives three wide frames of 4 × 2 inch each, a classic flipbook size. |
| Frame Per Second | How many frames are taken from each second of video. This decides the page count. |
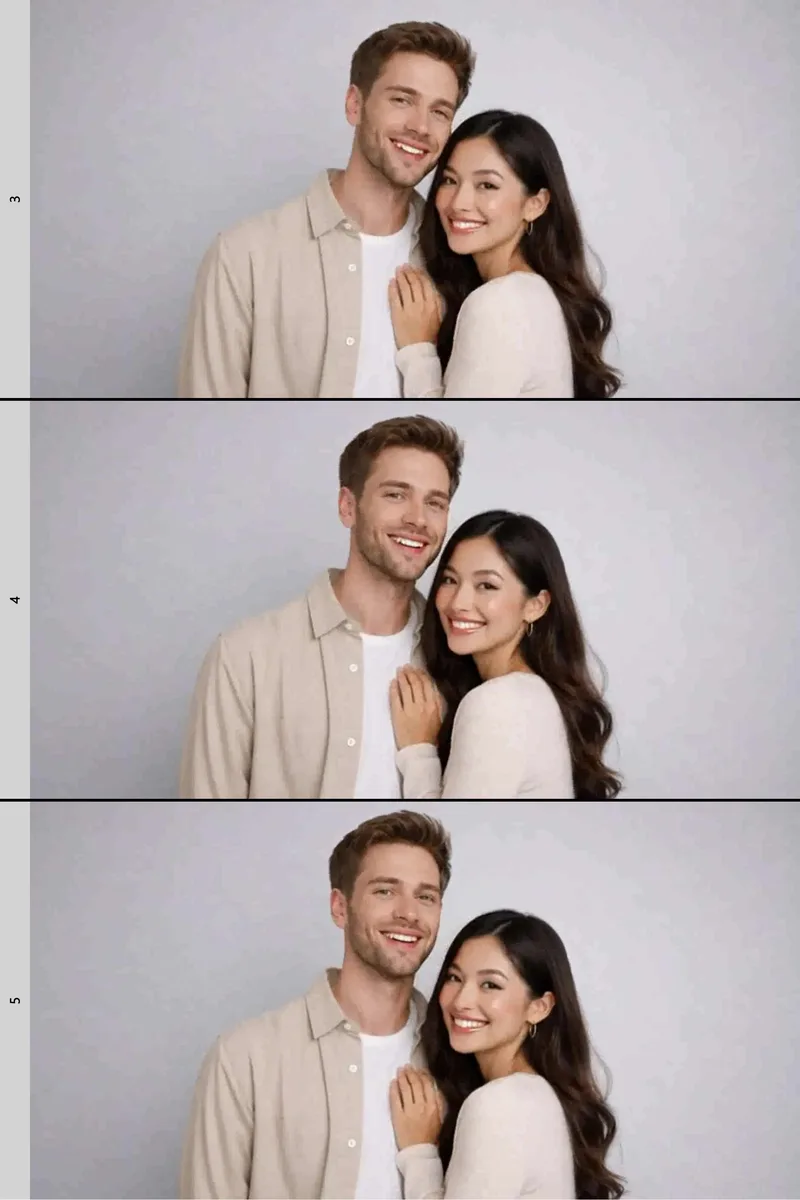
| Binder (Pixel) | The binding side (Left, Right, Top, Bottom or None) and the width of the empty strip left there for the clip. Each strip carries the frame number, which keeps your pages in order later. |
| Line Color (Pixel) | The colour and pixel value of the guide lines drawn between frames. These are your cut lines; keep them thin and dark so they disappear in the cut. |
| Image Size | Crop fills each frame edge to edge; Fit keeps the whole picture and leaves blank bands. Use Crop for flipbooks so nothing jumps around. |
| Image Order | Left-Right or Top-Bottom: the order frames are placed in the rows × columns grid. |
The binder side must match the side you will actually clip. If you choose Left but bind at the top, the empty strip is on the wrong side and the clip covers the picture.
Content tab: where the frames come from
Choose one of two sources at the top of the Content tab.
Video Recorder
Films the guest right at the booth.
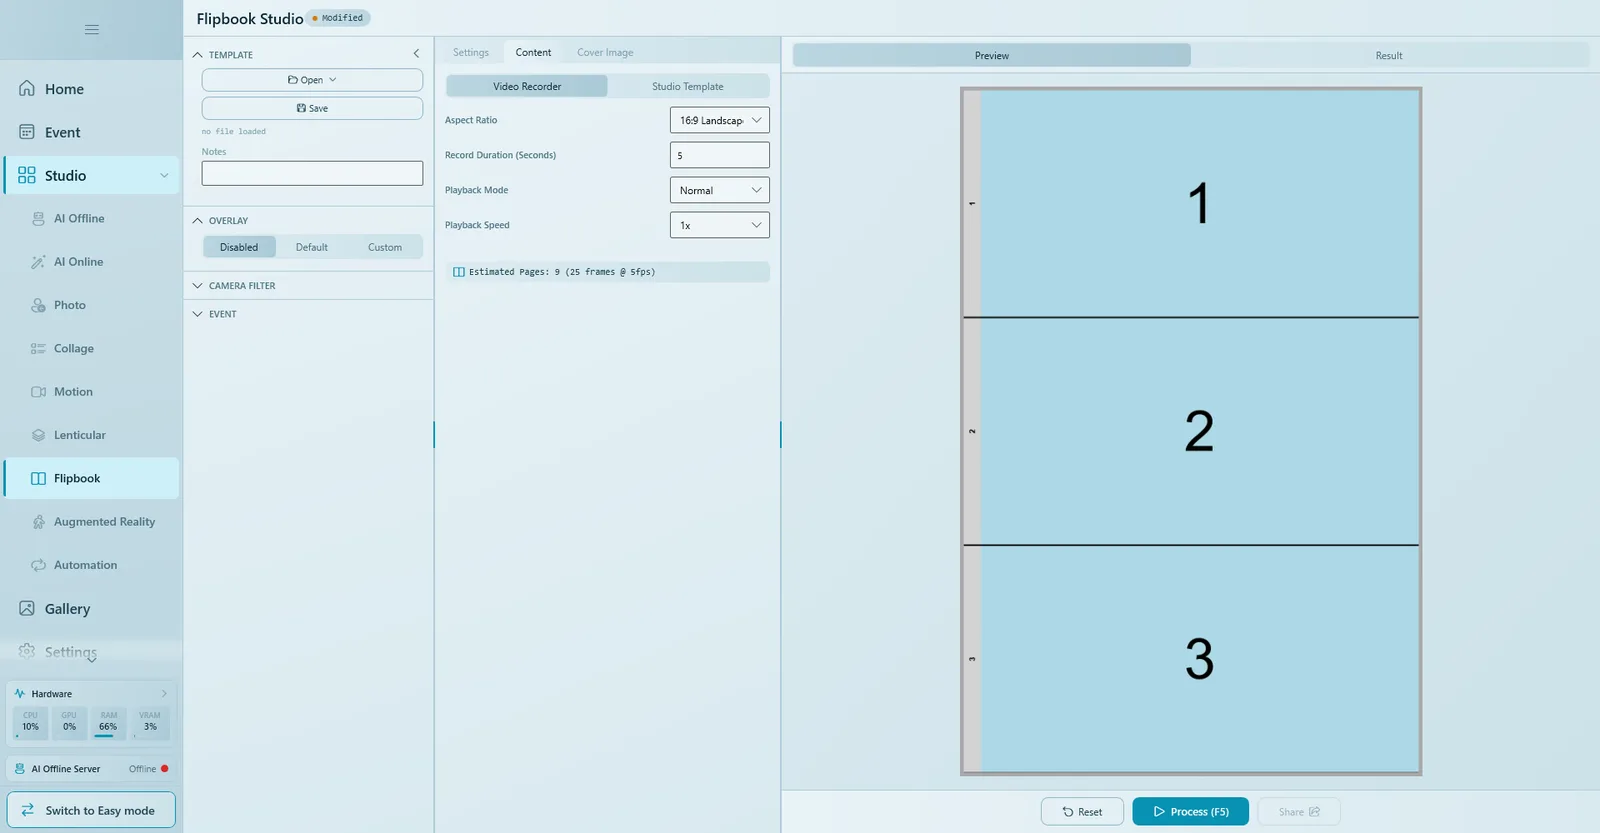
| Setting | What it does |
|---|---|
| Aspect Ratio | Shape of the recording. 16:9 matches the wide 3 × 1 frames. |
| Record Duration (Seconds) | How long the camera records. Five seconds is plenty; a flipbook is one small moment. |
| Playback Mode | Normal, Reverse or Boomerang (forward, then back). Boomerang doubles the frames, so roughly twice the pages. |
| Playback Speed | 0.5x, 1x, 1.5x or 2x. |
Studio Template
Takes the video from another studio instead of the camera. Choose the Studio Type (Motion Studio or AI Online), then Create New or Open an existing template. An AI Online template must end in a video output. This lets a guest take one photo, have AI bring it to life, and receive it as a flipbook.
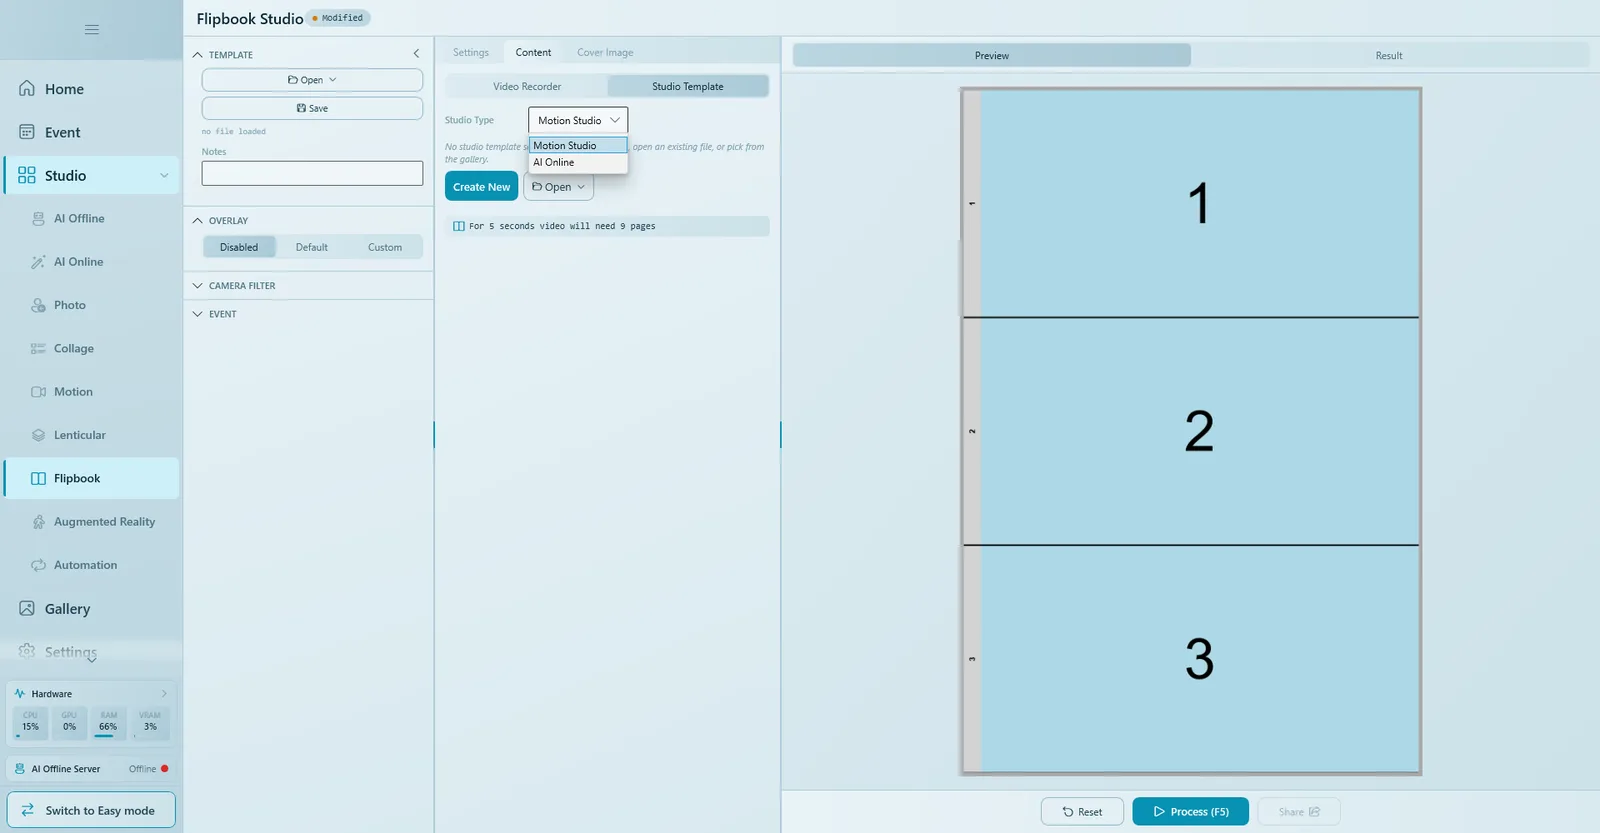
- Max Video Length limits how much of the template's video is used (frames are taken from the start). Full length uses all of it.
- The estimate here assumes a 5-second video ("For 5 seconds video will need … pages"), because the real length is only known after the template runs. Treat it as a rough guide.
Cover image and overlay
- Open the Cover Image tab and switch on Use cover image.
- Click Select Image and pick a saved image file (the camera is not available for the cover).
- The cover takes the first cell of the first page, without a binder strip.
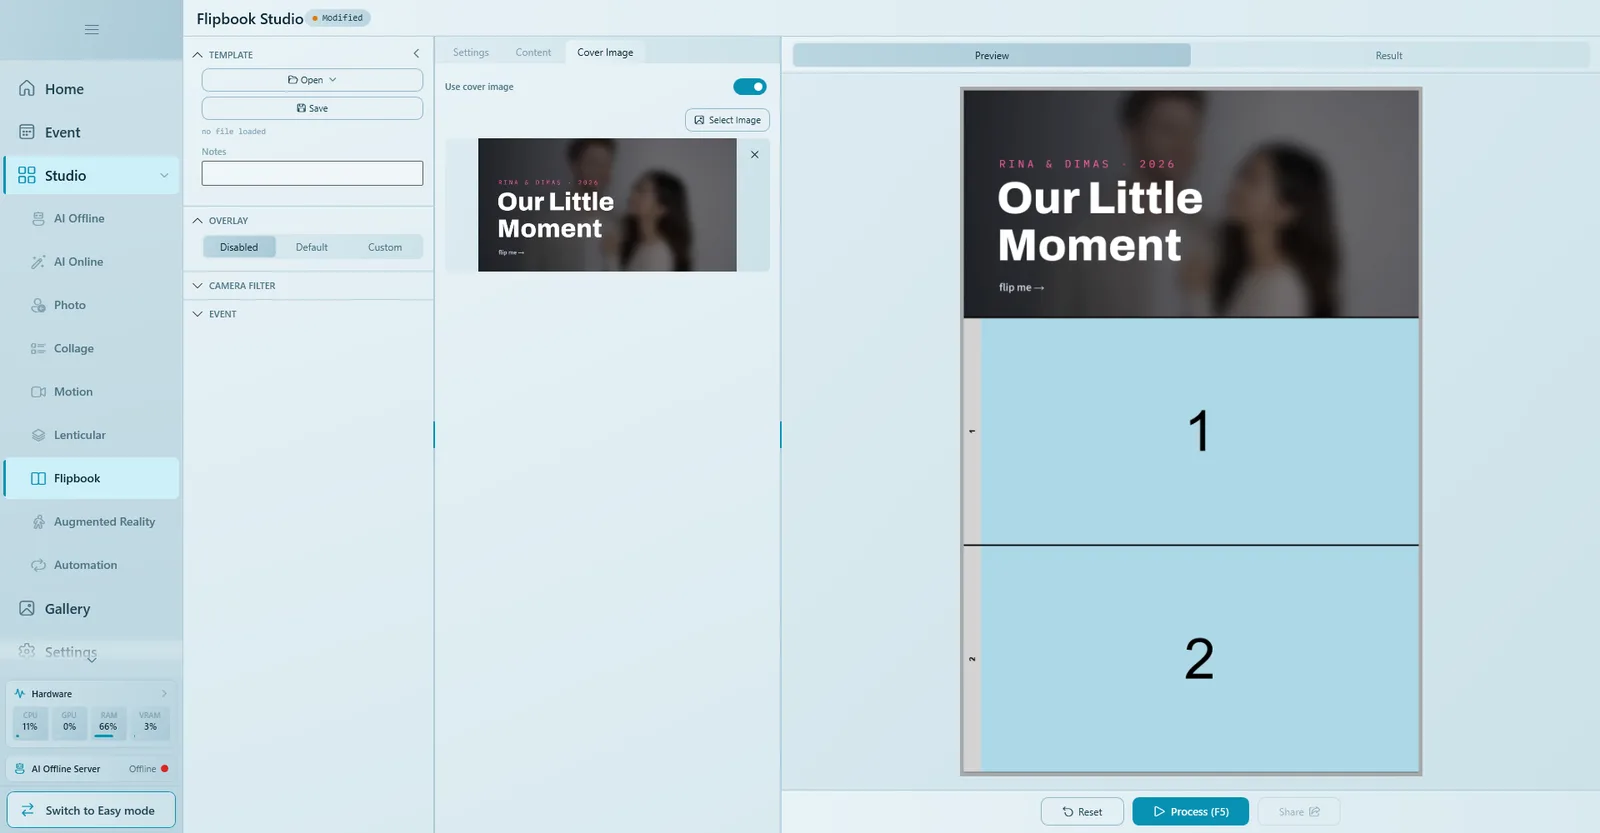
You can pick a cover image even while Use cover image is off, but then it is not used. Always check the switch.
Overlay in the left panel puts your branding (event logo, date) on every frame: Disabled, Default (the overlay from your settings) or Custom (an overlay just for this template). Turn on Apply overlay for cover page if the cover should get the overlay too.
Save, process and check the result
- Use the Preview / Result switch above the canvas. Preview shows one sample page that updates as you change settings.
- Click Save. Flipbook templates are saved as
.qsffiles. At an event, this file is all you need. - Click Process (F5) and choose the video source; at a booth that is the camera. It counts down, records, and the rest is automatic.
- The Result view shows two things: the video (guests download it with the QR code) and the pages. Use the arrows at the top right to flip through them.
Print the pages
- Click Share, then Print.
- All pages are already selected. Print them in one go on the paper size you set (for example 4 × 6).
Cut, stack and bind
- Cut along the lines. A guillotine keeps every frame exactly the same size, which is what makes the book flip smoothly.
- Stack the frames by the numbers on the binder strip: frame 1 on top (after the cover), all strips on the same side.
- Square the stack by tapping it on the table.
- Bind the binder edge with a binder clip, two staples or a strip of tape.
- Flip: hold the binder edge and let the pages run off your thumb from the other edge.
Using it at an event
Add the saved template to an event (see Templates). Guests record at the booth, the pages are printed, and the video is shared by QR. Printing and sharing are set up per event in Sharing & printing.
Three things to remember
- Frames per second decides the page count.
- Crop keeps every frame full and steady.
- The numbers on the binder strip keep your pages in order.
Troubleshooting
Too many pages are printed.
Lower Frame Per Second or Record Duration (Seconds), use more frames per page in Composition, or switch Playback Mode from Boomerang to Normal.
The clip covers part of the picture.
Check that the binder side matches the side you clip, and increase the binder width.
The animation jumps or frames look different sizes.
Use Crop for Image Size, cut with a guillotine along the lines, and stack strictly by the frame numbers.
The cover does not appear.
Turn on Use cover image on the Cover Image tab; picking an image alone is not enough.
"AI-Online must produce a Video output for Flipbook."
The AI Online template you chose ends in an image. Use a template whose final step produces a video, or use Motion Studio.
Next steps
Still need help?
Our team answers on WhatsApp. Tell us your Q-Booth version and what you see on screen.